Onboarding with Send It Secure
- Thank you for considering Send It Secure by Protected Trust for your email encryption needs. Send It Secure is very easy to use and will help you meet compliance, including HIPAA.
Here are a few highlights:
- You can keep your existing email address
- Encryption account setup only takes a few minutes
- No contracts to purchase, payments are monthly
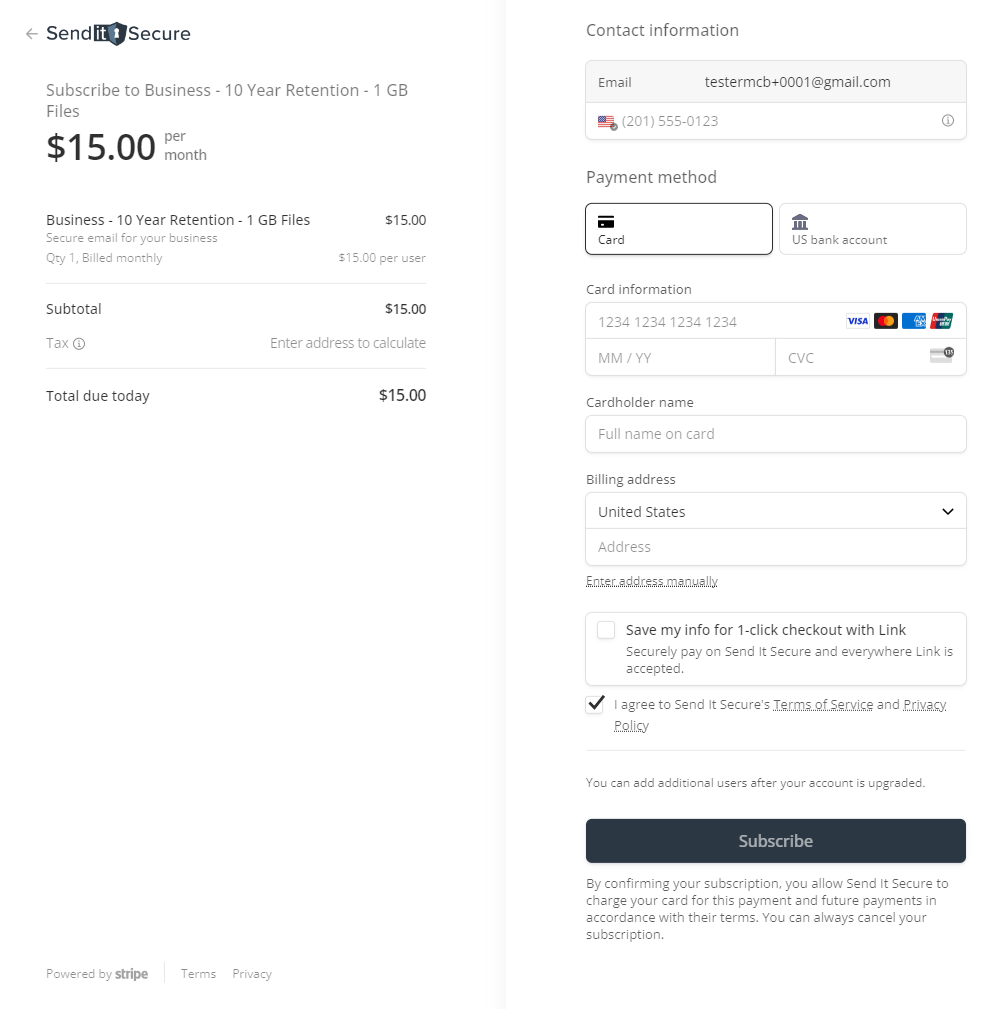
Steps to create a subscription
You must create an account before you can create a subscription.
- Login or Sign Up
- Navigate to https://app.protectedtrust.com/Dashboard
- In the banner, at the top of the page, click the UPGRADE NOW button

- Enter the payment method you want to have on file your subscription, check to agree to terms of service, then click Subscribe
-
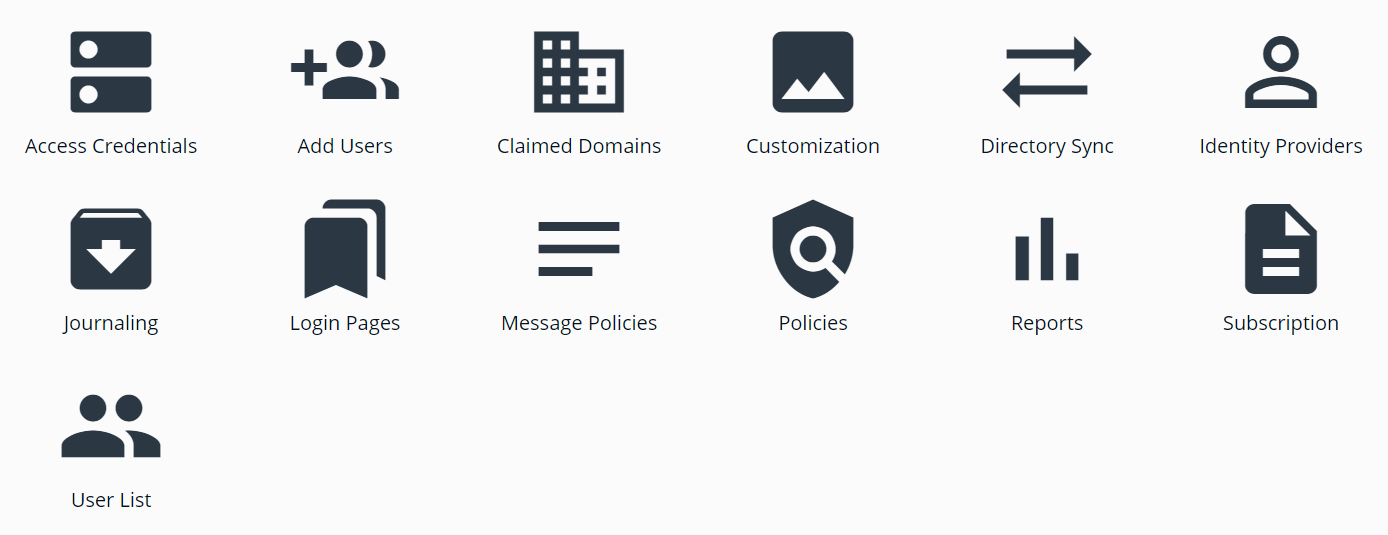
If you would like to add additional users, click the Add Users button on the Dashboard, to invite additional users
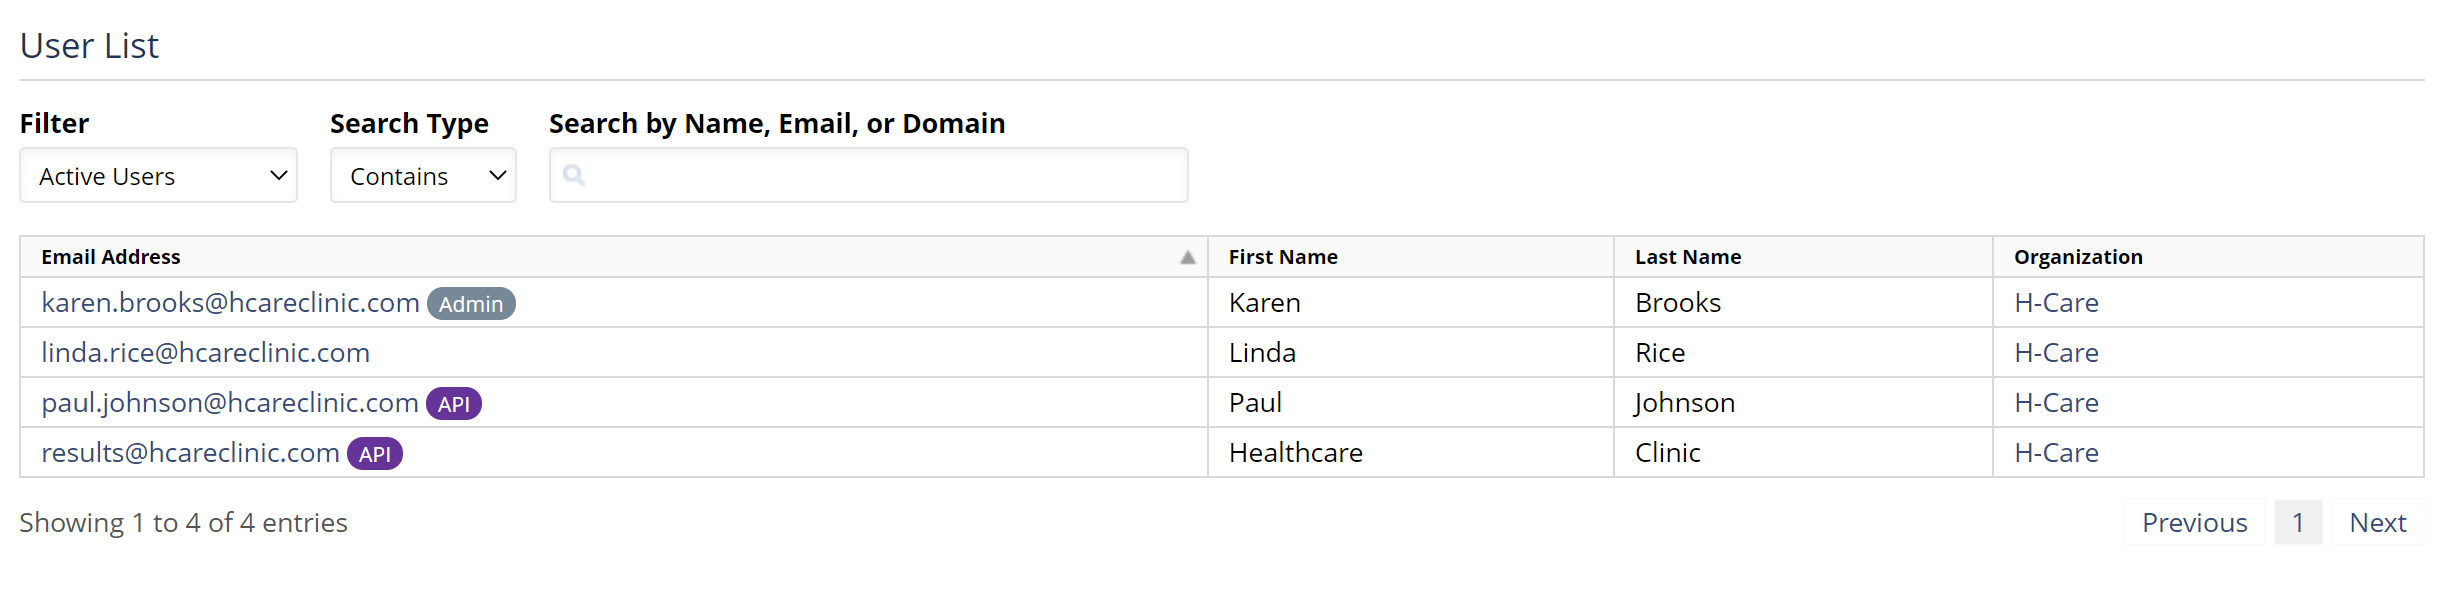
Ensure your users are added to your organization
Users must be in the Active Users list to send secure messages
Most Send It Secure users start out with free accounts. When you decide to purchase, you must ensure your users are correctly assigned to your organization. This requires extra steps for each individual user that you want to be moved into your organization.
- To view the current users in your Send It Secure organization, go to your Dashboard and select User List.
- If a user is not in your User List, you must invite the user to join your organization via the Add Users page. Steps to Add Users
- After you have invited users on the Add Users page, you can view pending invitations from the User List using the Filter droplist to view Pending Invitations.

Follow these Next Steps to customize your Organization
- Add your Organization's Logo How to customize the branding that shows to your recipients and users in your organization
- Add additional users How to add users
- Customize your default email settings How to customize new message settings
- Integrate with other 3rd party applications to streamline your workflow
- How to integrate with Windows & Microsoft Outlook Desktop App
- How to integrate with Practice Management Software and EHR's
- How to integrate with any 3rd party application that can send email
- How to integrate with Outlook Web Access aka OWA