Eaglesoft Integration - Configure Eaglesoft SMTP settings
With Send It Secure, you can:
- Integrate directly with Eaglesoft to securely send referrals and x-rays to other healthcare providers directly from Eaglesoft.
- Send HIPAA compliant email directly from Eaglesoft, designed for ease of use for patients and providers
- Send x-rays, images, photos, patient treatment, implant planning, and much more directly from Eaglesoft to patients, colleagues, and insurance carriers.
- Easily print to PDF from any Windows application adding HIPAA compliance options to your daily tasks
Eaglesoft versions:
- This article shows the steps to setup secure email from Eaglesoft version 22 and higher (including Eaglesoft version 23 and 24)
- See this article for instructions for setting up secure email with Eaglesoft version 21 and lower.
Configuring Secure Email in Eaglesoft
You must be an administrator to create an access credential on a user
- Login or Start a Free Trial
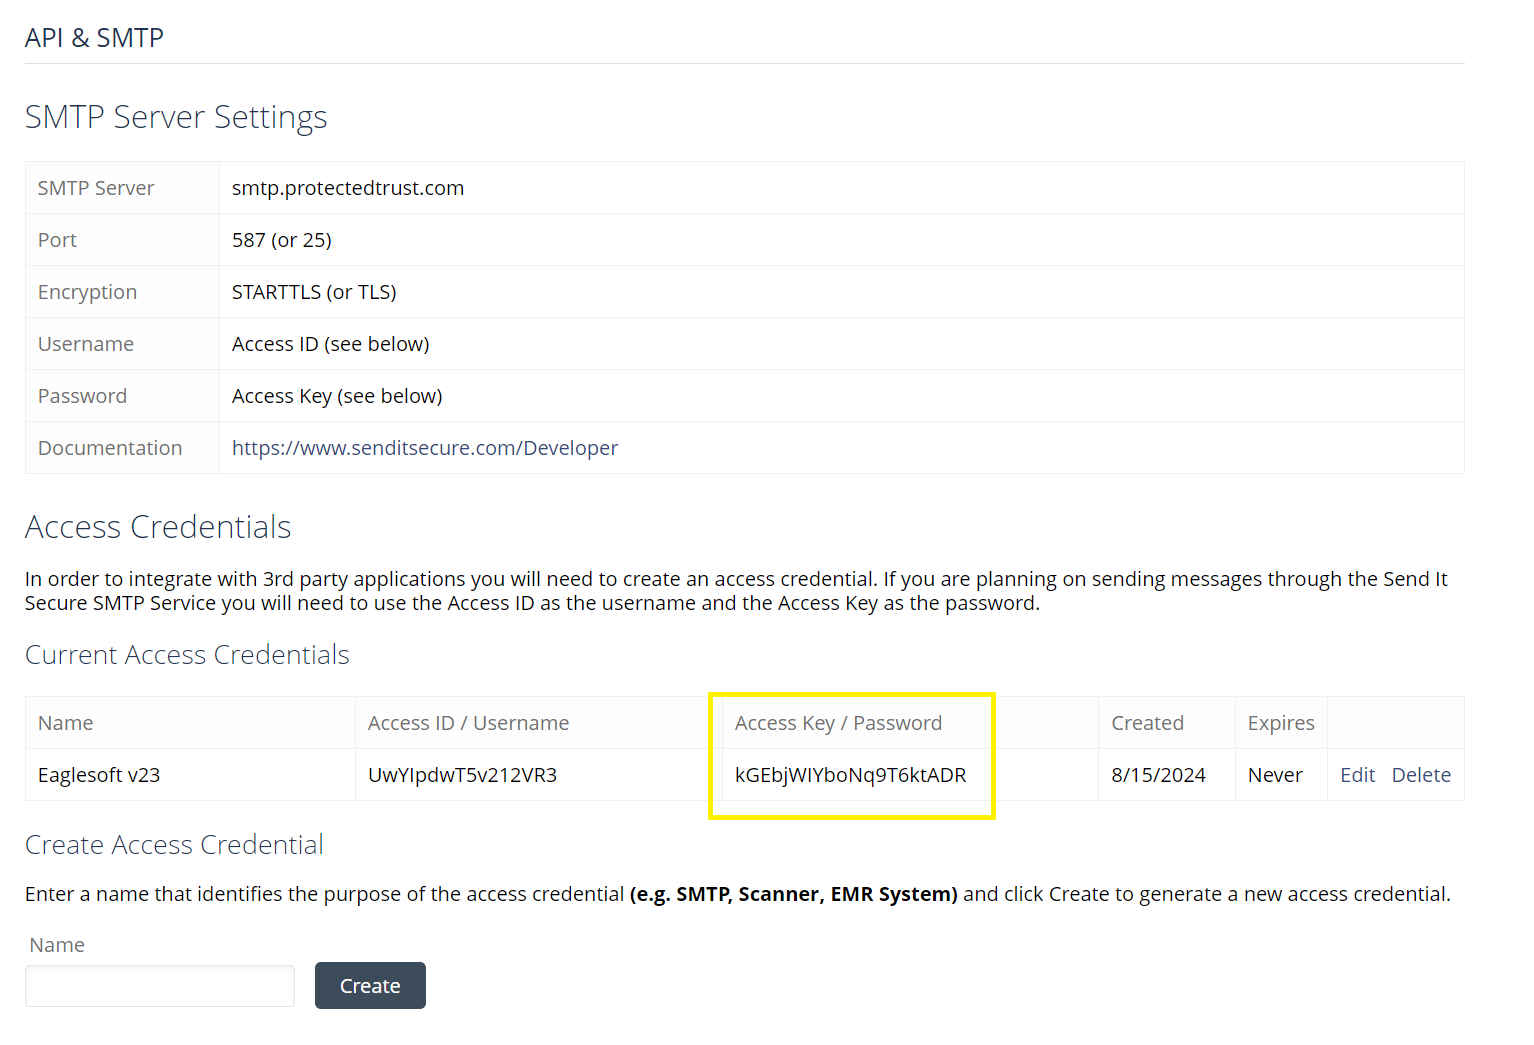
- Create an access credential in Send It Secure
- Keep the API & SMTP page open for the user from Step 1. You will need this information later.
For example:
In Eaglesoft, from the Practice Management screen, go to Utilities | Manage Integrated Applications. For reference: https://pattersonsupport.custhelp.com/app/answers/detail/a_id/43579/~/configuring-e-mail-in-eaglesoft
- Select E-mail Configuration and use the data from the API & SMTP page you left open in Send It Secure to fill out the required fields, Step 1.
- On the E-mail Configuration page, add the E-mail Address from Step 1.
- The App Password is the Access Key/Password from Step 1.
- Enter the Display Name you would like to show on outgoing emails.
- Enter smtp.protectedtrust.com in the SMTP Server field.
- Enter 587 in the Port field.
- Check the Use TLS/SSL checkbox.

- Click Send Test E-mail to send a test email
- Click Save to save your changes
If you don't already have a Send It Secure account, you can Start a Free Trial now.