Verification options for secure messages
Every message you send from Send It Secure is encrypted. Whether you're asked to set a verification method when you click Send comes down to one thing: whether your recipient already has a Send It Secure account (a password) in our system. This article explains what happens in each case, and the verification options available to you as a sender.
Watch it in action
If your recipient already has an account, it just sends
When you send a secure message to someone who already has a password in our system, the message sends without prompting you for Message Security Settings. There's nothing extra to set — the recipient opens the message with their own credentials, and they manage (and can reset) their own password at any time. This is the most common reason a sender isn't prompted for a code or phone number.
Hint: if you are not prompted to enter a one-time password, the recipient already has a password registered in the system. See Why am I not prompted to enter a code or phone number when sending a message?
If your recipient doesn't have a password, choose a verification method
If your recipient isn't registered, you'll see the Message Security Settings dialog when you send. This is where you assign a one-time verification method for that message, so only the intended recipient can open it.
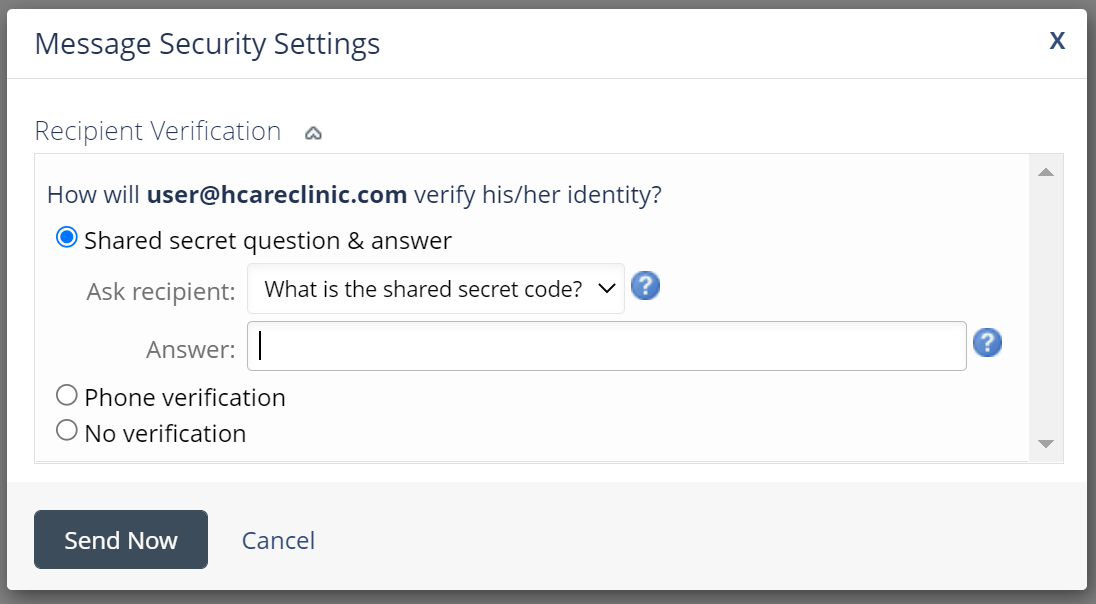
By default you have two options:
- Question/Answer — You set a question and answer when sending, and the recipient must provide the exact answer to open the message. We recommend choosing a question and answer that both you and the recipient already know — for example, an account number, or the 4-digit year the patient was born. Admins can set a default custom question or build a list of questions to pick from a drop-down.
- Phone Verification — You enter the recipient's phone number, and they receive a call or text with a code to enter as identity verification.
With a business account (included in your subscription), Message Policies unlock two more:
- Verify using the recipient's password — If the recipient isn't registered when you send, they're prompted to set their own password (they just enter a first name, last name, and password). From then on, all messages to that recipient use their password, and they can reset it at will. This is usually the most convenient method for both sender and recipient.
- No Additional Verification — Lets you send to unregistered recipients who can open the message without any extra verification. The message is still fully encrypted, but anyone with access to that recipient's mailbox could click the link and view it. This is technically HIPAA compliant, but not the best practice when the message contains PPI (personal private information). It's a great fit for requesting files or having someone complete a form — you send a blank form or request, and they reply with the private data, which comes back to you under your credentials.
Note: the system remembers the last one-time password (answer or phone number) used for a recipient and auto-fills it the next time you message them. To change it, delete the *** in the field and enter a new value.
Recap: two types of recipients
- Registered recipients already have an account with us (their own username and password), so no verification method is needed — the message just sends, and they open it with their own credentials.
- Unregistered recipients trigger the Message Security Settings dialog, where you choose how they'll verify their identity to open the message.