Add Send It Secure as a safe sender in Outlook & Microsoft 365
When you have a secure message, Send It Secure sends you an unencrypted notification email. If those notifications land in Junk — or are quarantined by your mail security — adding Send It Secure as a safe sender fixes it. Add no-reply@protectedtrust.com (and support@senditsecure.com) as safe senders.
Not sure which one you're using? See Which version of Outlook do I have?
Tip: even if a notification is delayed or blocked, you can always sign in at app.protectedtrust.com to read your secure messages from your Inbox.
Outlook (desktop)
- Compose a new message
- Confirm the lock is NOT locked (so you're sending a regular email, not a secure email)
- To: no-reply@protectedtrust.com
- Subject: Test
- Send the message
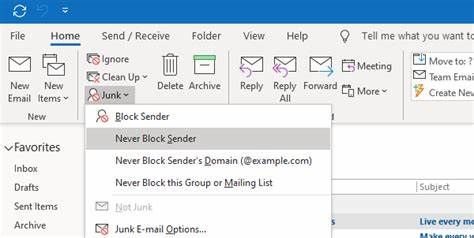
- Go to your Sent folder, right-click the test message you sent, and select Junk > Never Block Sender
Outlook.com / Microsoft 365 (web)
Tip: to go directly to the Quarantine page, use https://security.microsoft.com/quarantine.
- Sign in and look for the notifications from no-reply@protectedtrust.com.
- Click the notification and Release the message — it should then appear in your Inbox, and may prompt you to always allow the sender.
- Open your safe senders list at https://go.microsoft.com/fwlink/?linkid=2035804 and add no-reply@protectedtrust.com. See Safe senders in Outlook.com (Microsoft Support) for details.
For IT administrators
If a mail gateway or security policy is filtering our notifications, allowlist the following:
- Senders: no-reply@protectedtrust.com and support@senditsecure.com
- IP addresses: 168.245.100.120 and 168.245.25.175
Still not receiving notifications after this? Contact our support team and we'll help trace the message.