Microsoft 365 DLP Setup (Send It Secure Smart Host)
Set up Microsoft 365 Exchange Online Data Loss Prevention (DLP) to detect outgoing messages with sensitive data and send them encrypted via Send It Secure. This is only one example of how to set Send It Secure as the Smart Host for an Exchange Online Send Connector.
Steps to set Exchange Online DLP to send encrypted messages via Send It Secure
You must have administrator permissions in Send It Secure (app.protectedtrust.com), Exchange Admin Center (admin.exchange.microsoft.com), and in most cases Microsoft Purview (compliance.microsoft.com)
- Create Send It Secure API/SMTP Credentials to use to authenticate when sending encrypted messages, these will be used in Step # below
How to: Create API Access Credentials »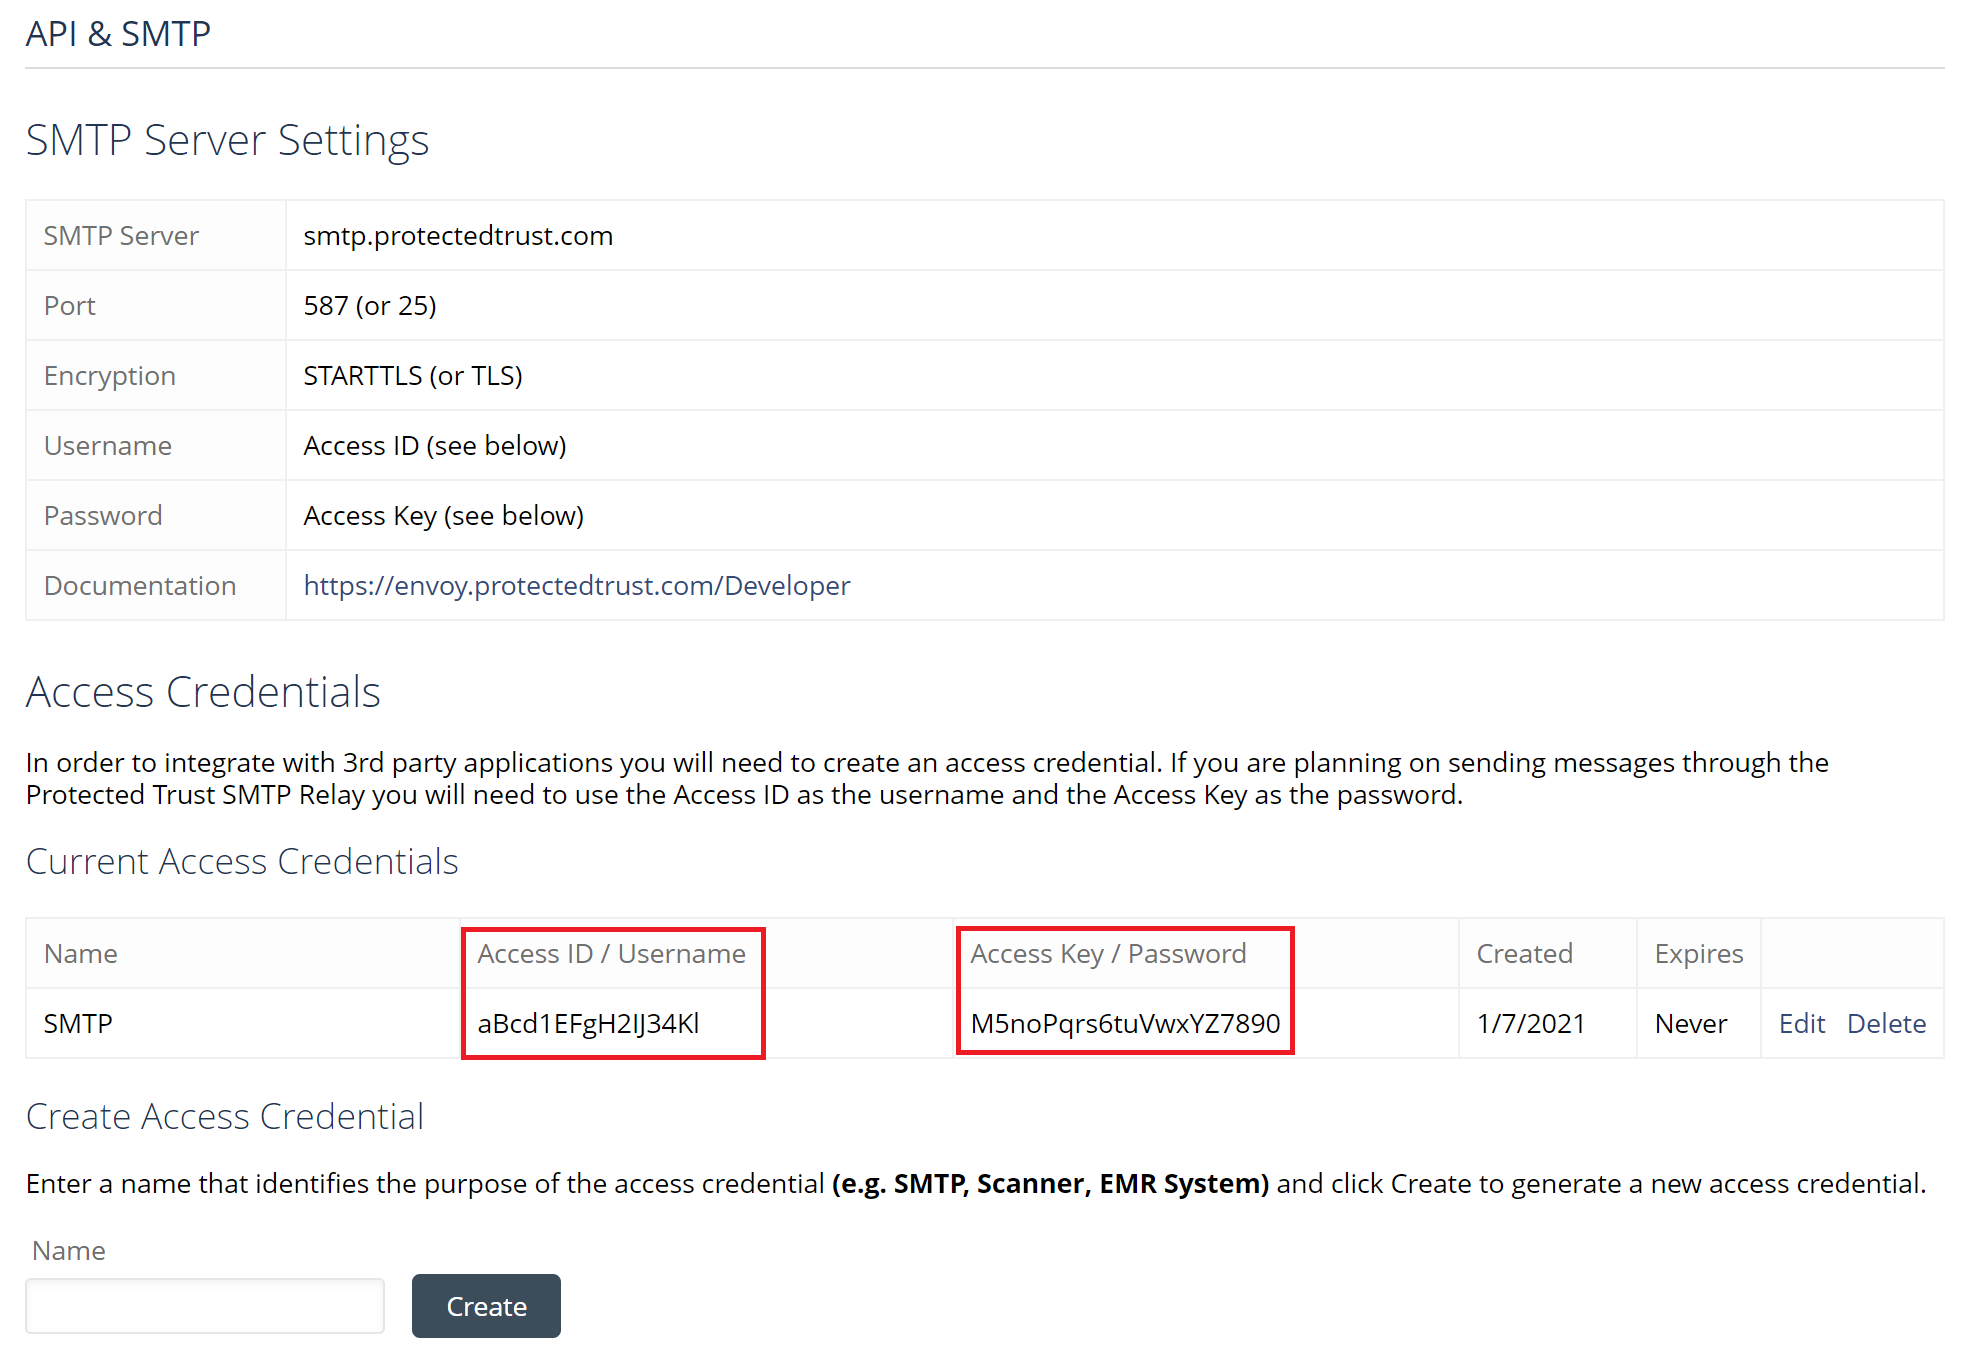
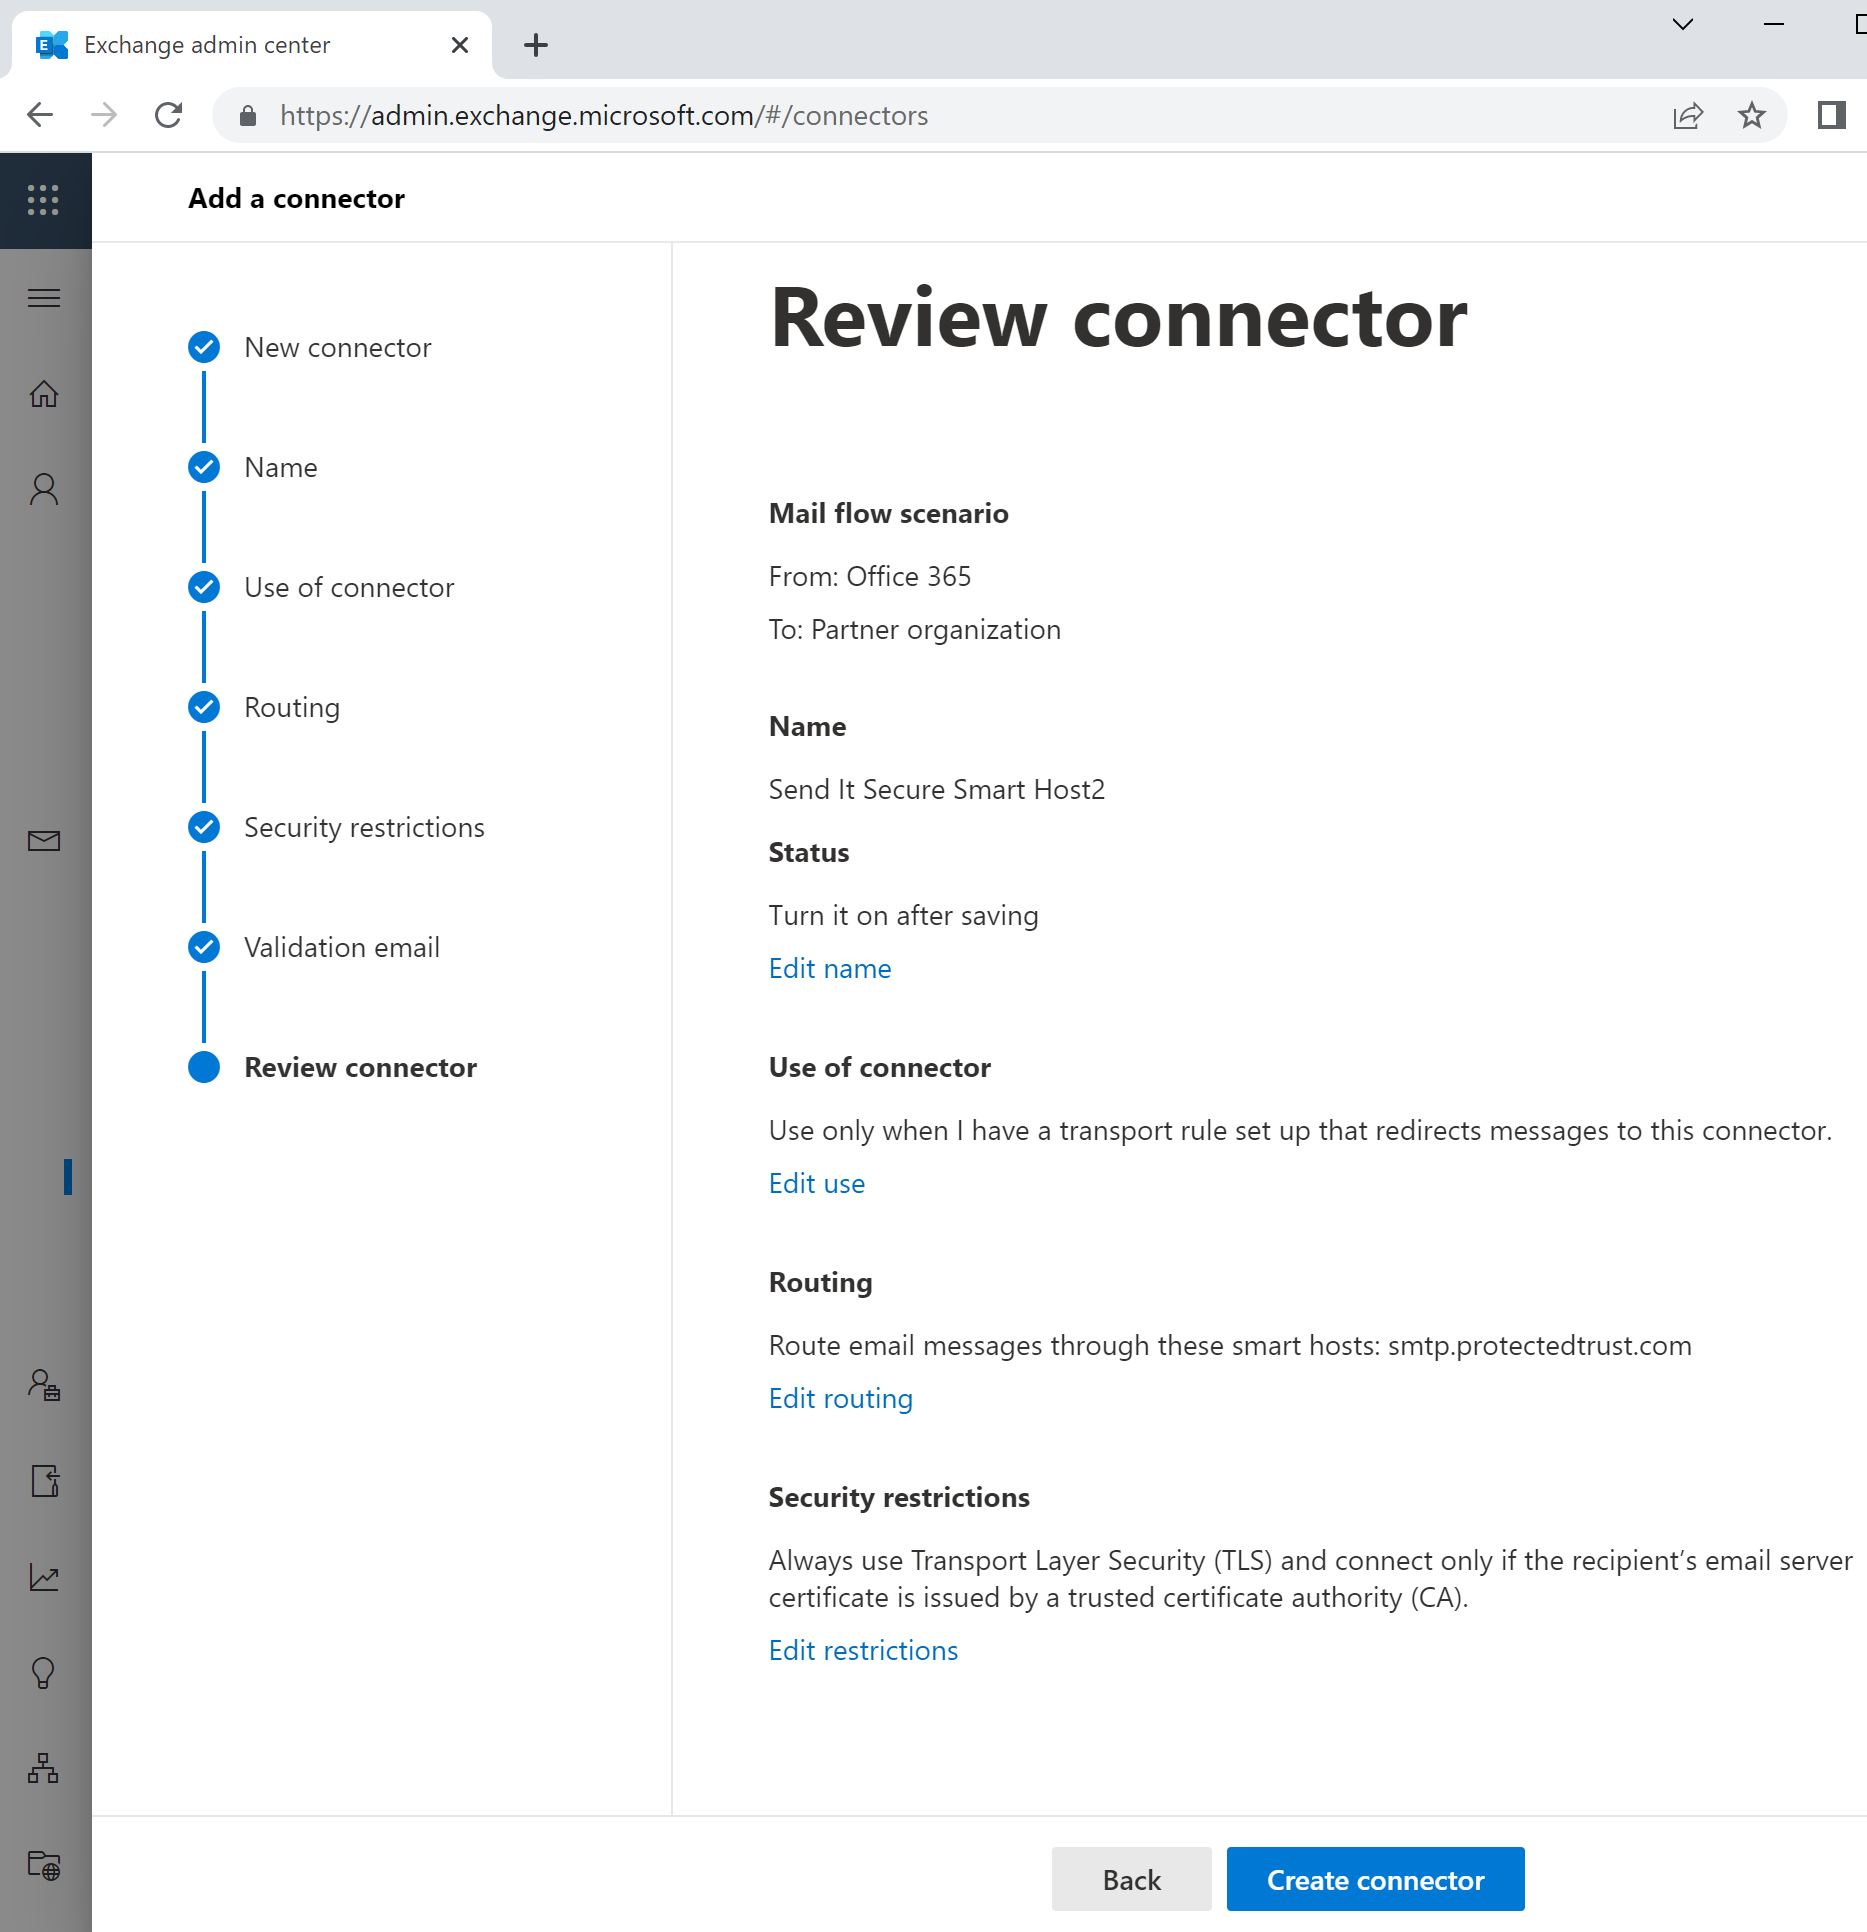
- Add an Exchange Mail Flow Send Connector to send messages to smtp.protectedtrust.com as the smart host
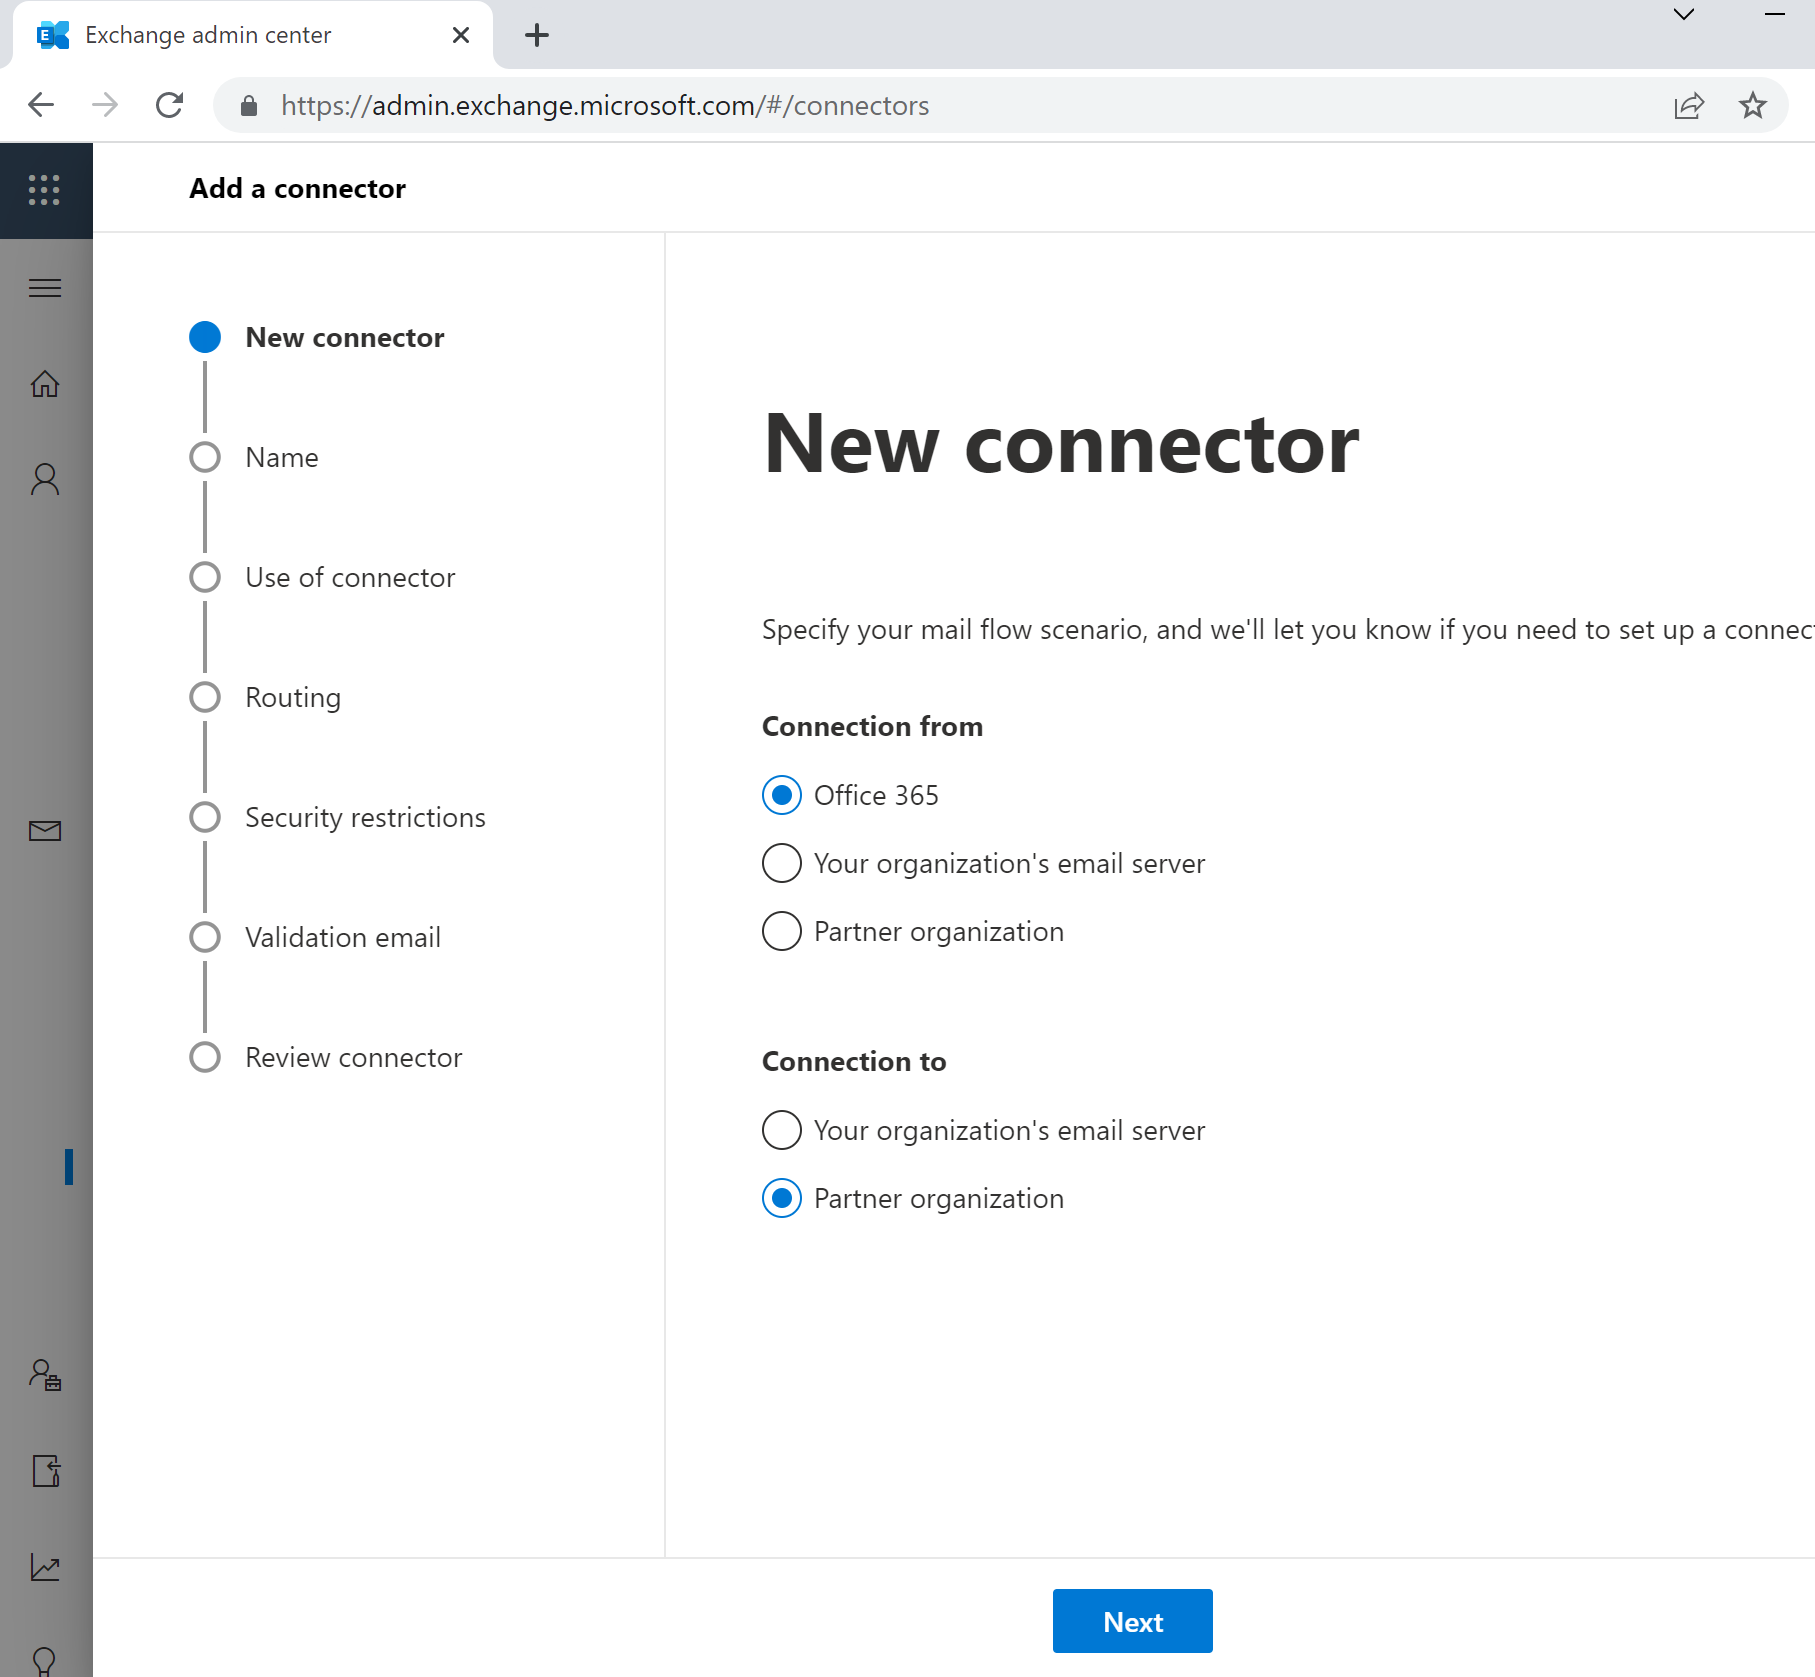
- Go to https://admin.exchange.microsoft.com/#/connectors
- Select +Add a Connector, Connections from Office 365, Connection to Partner organization, and click Next
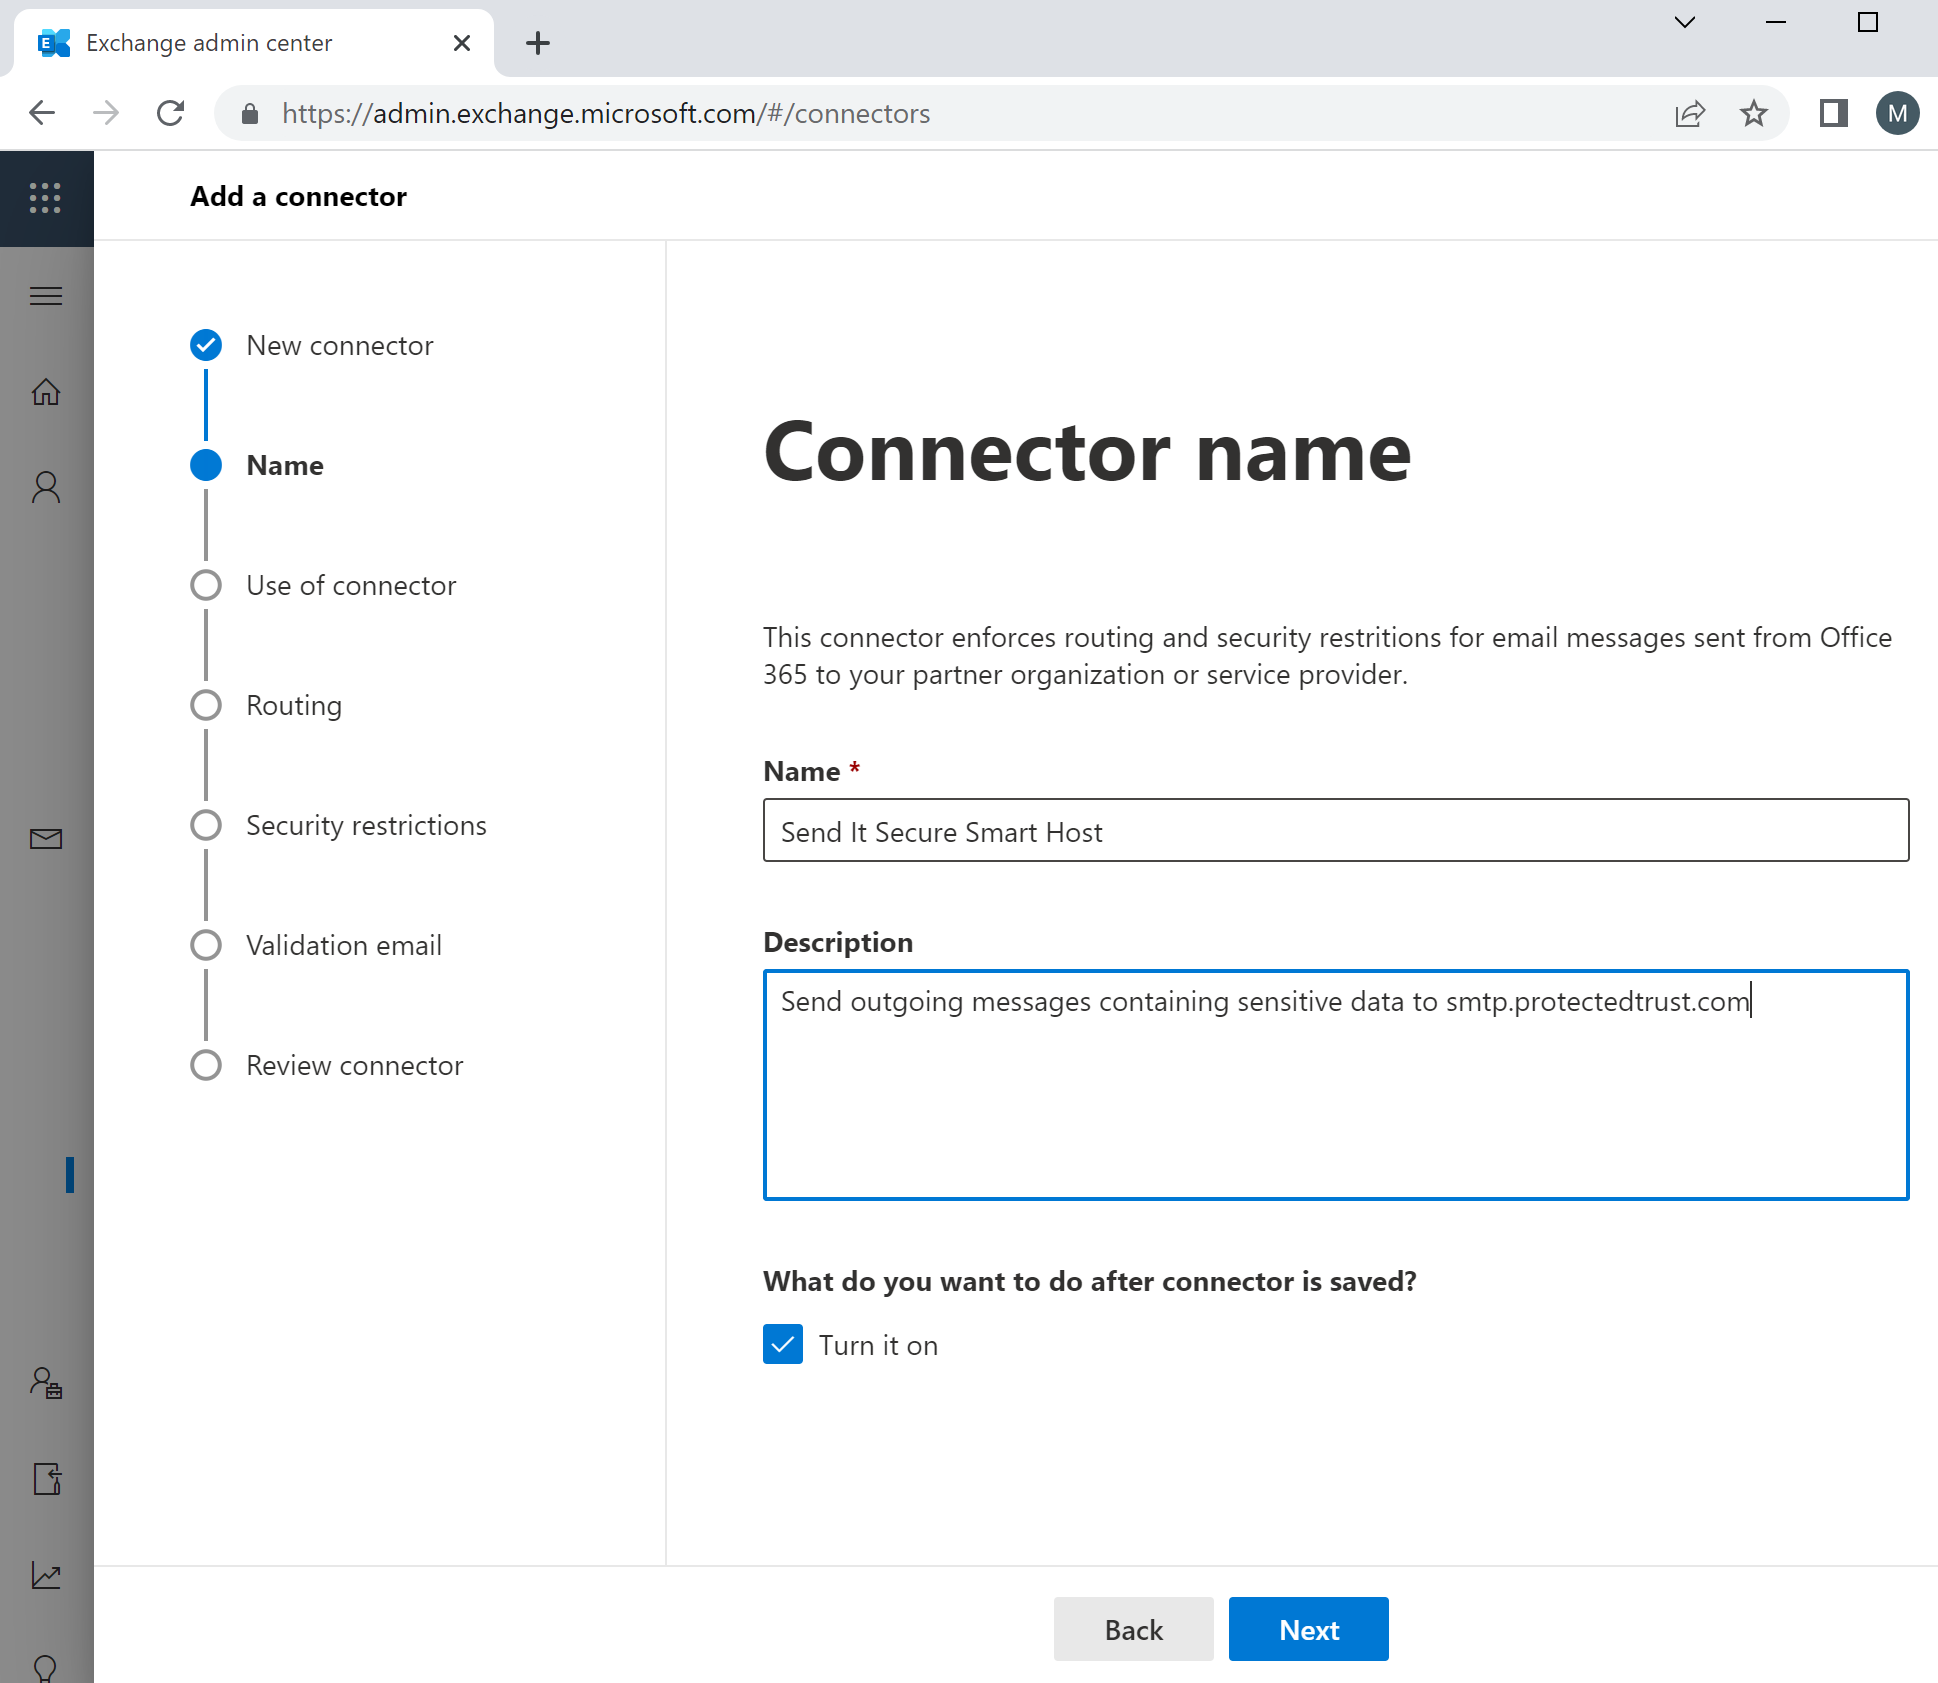
- Set Connector Name Send It Secure Smart Host, check the Turn it on checkbox, and then click Next
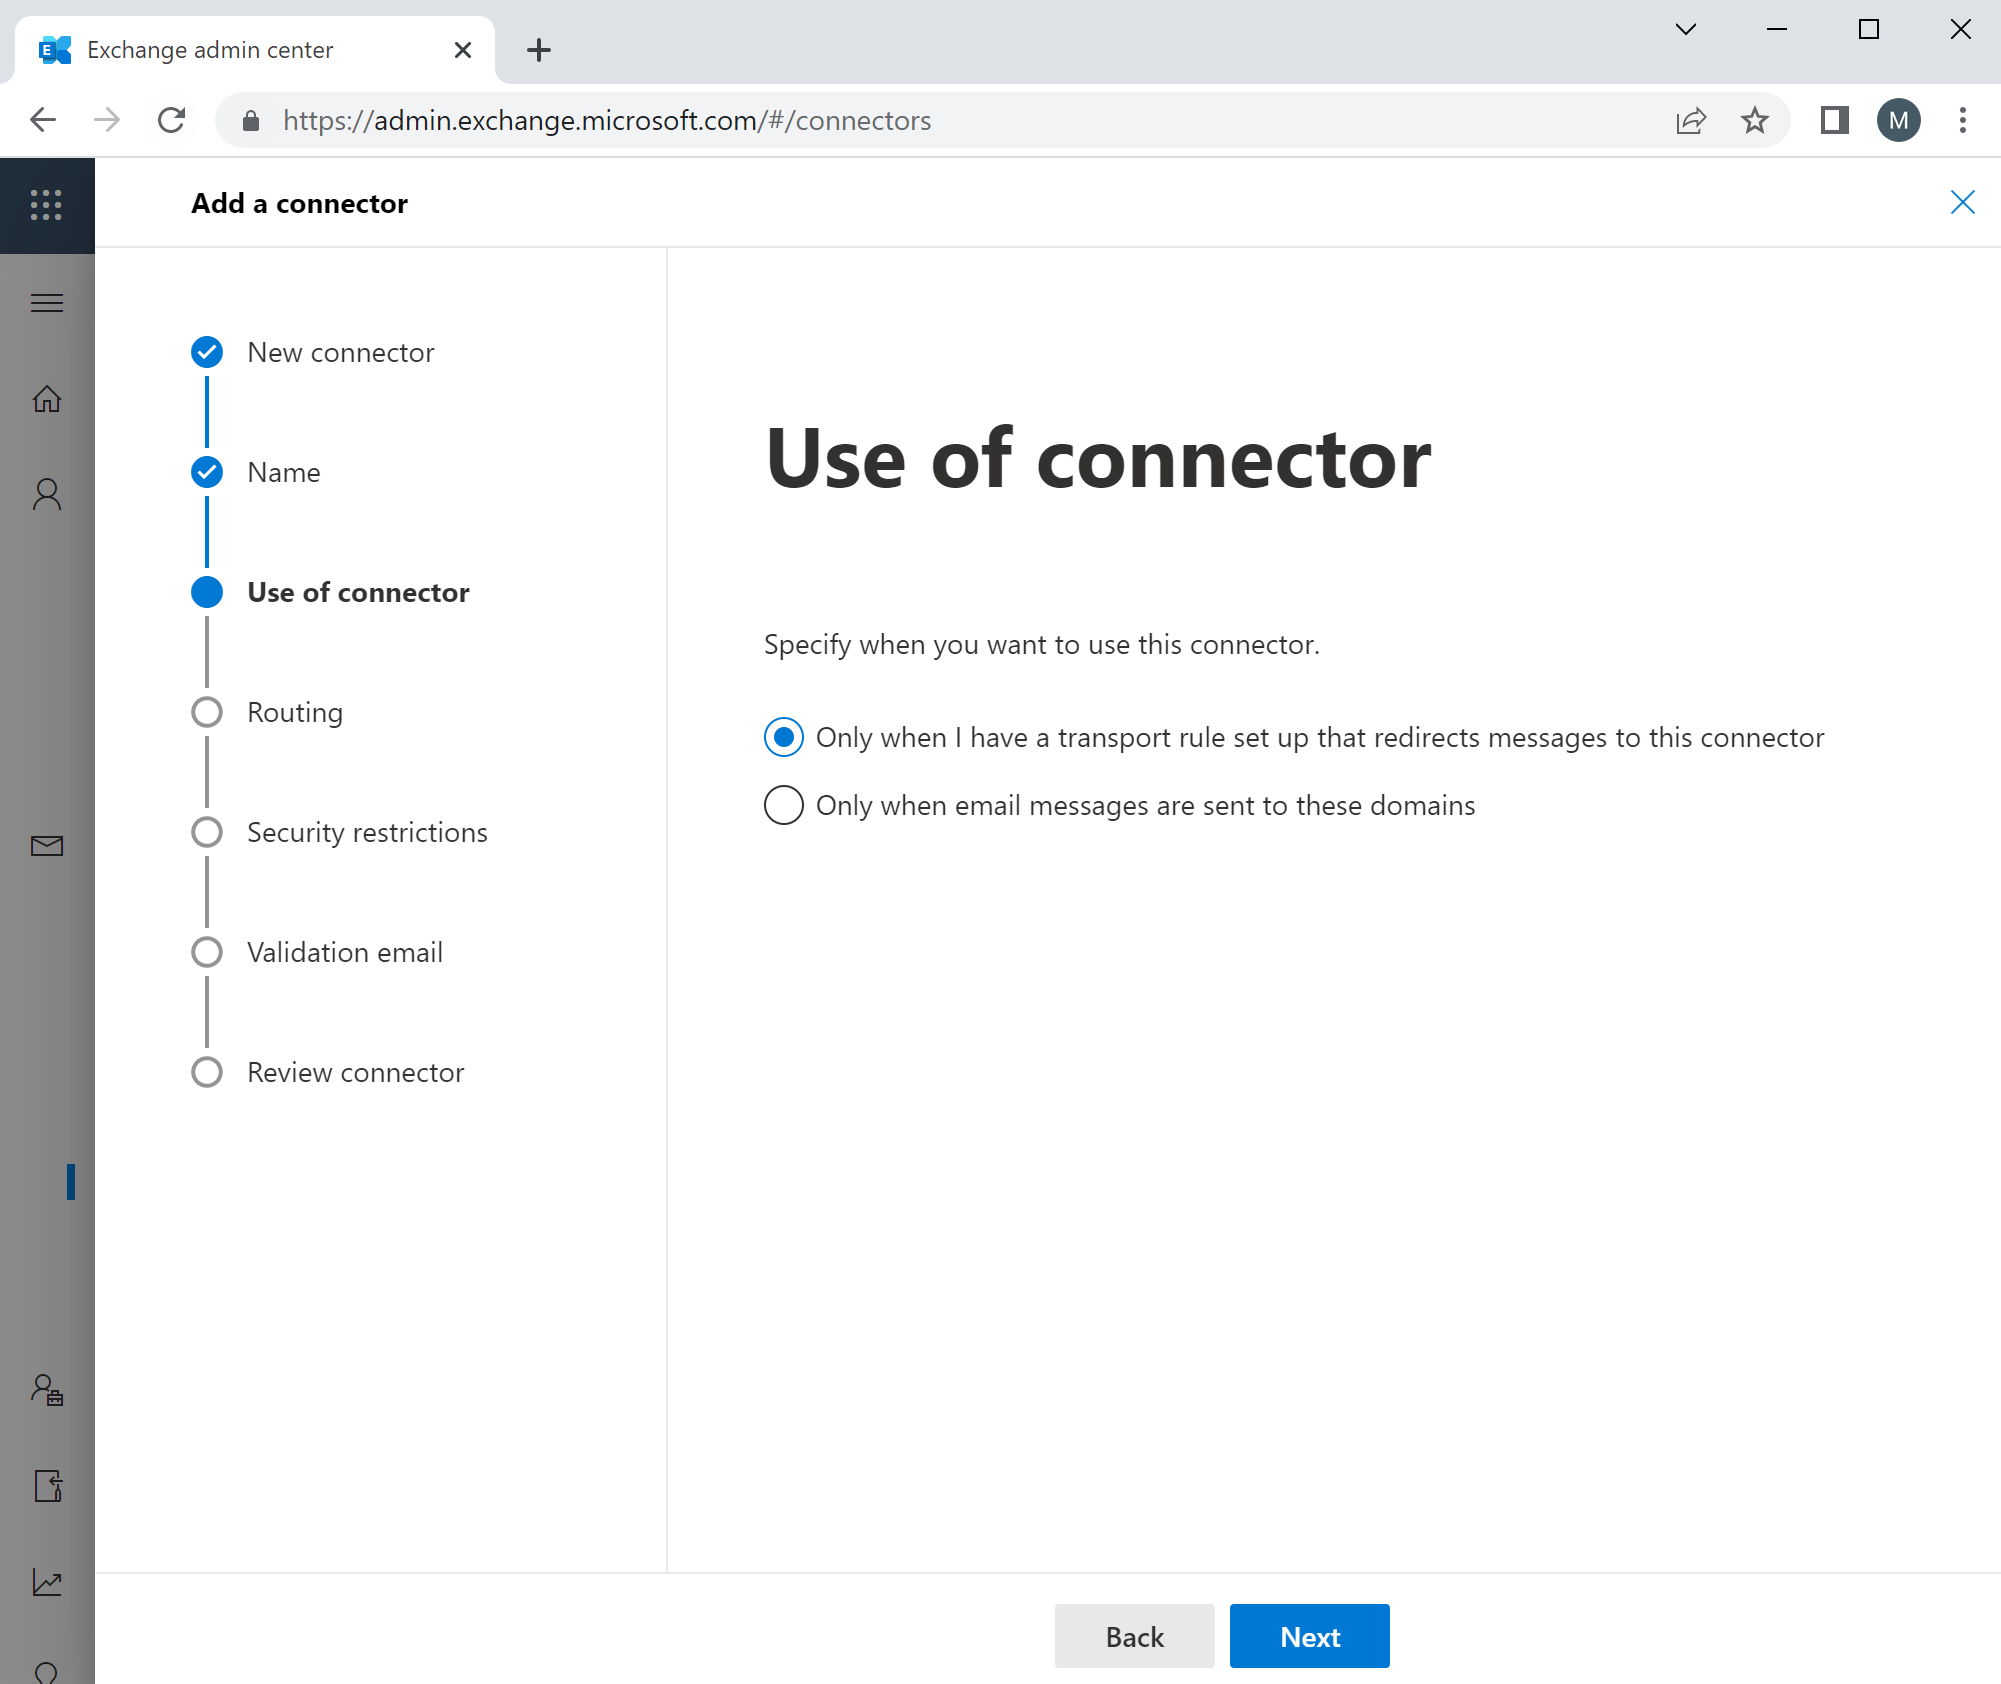
- Set to use the connector Only when I have a transport rule set up that redirects messages to this connector and click Next
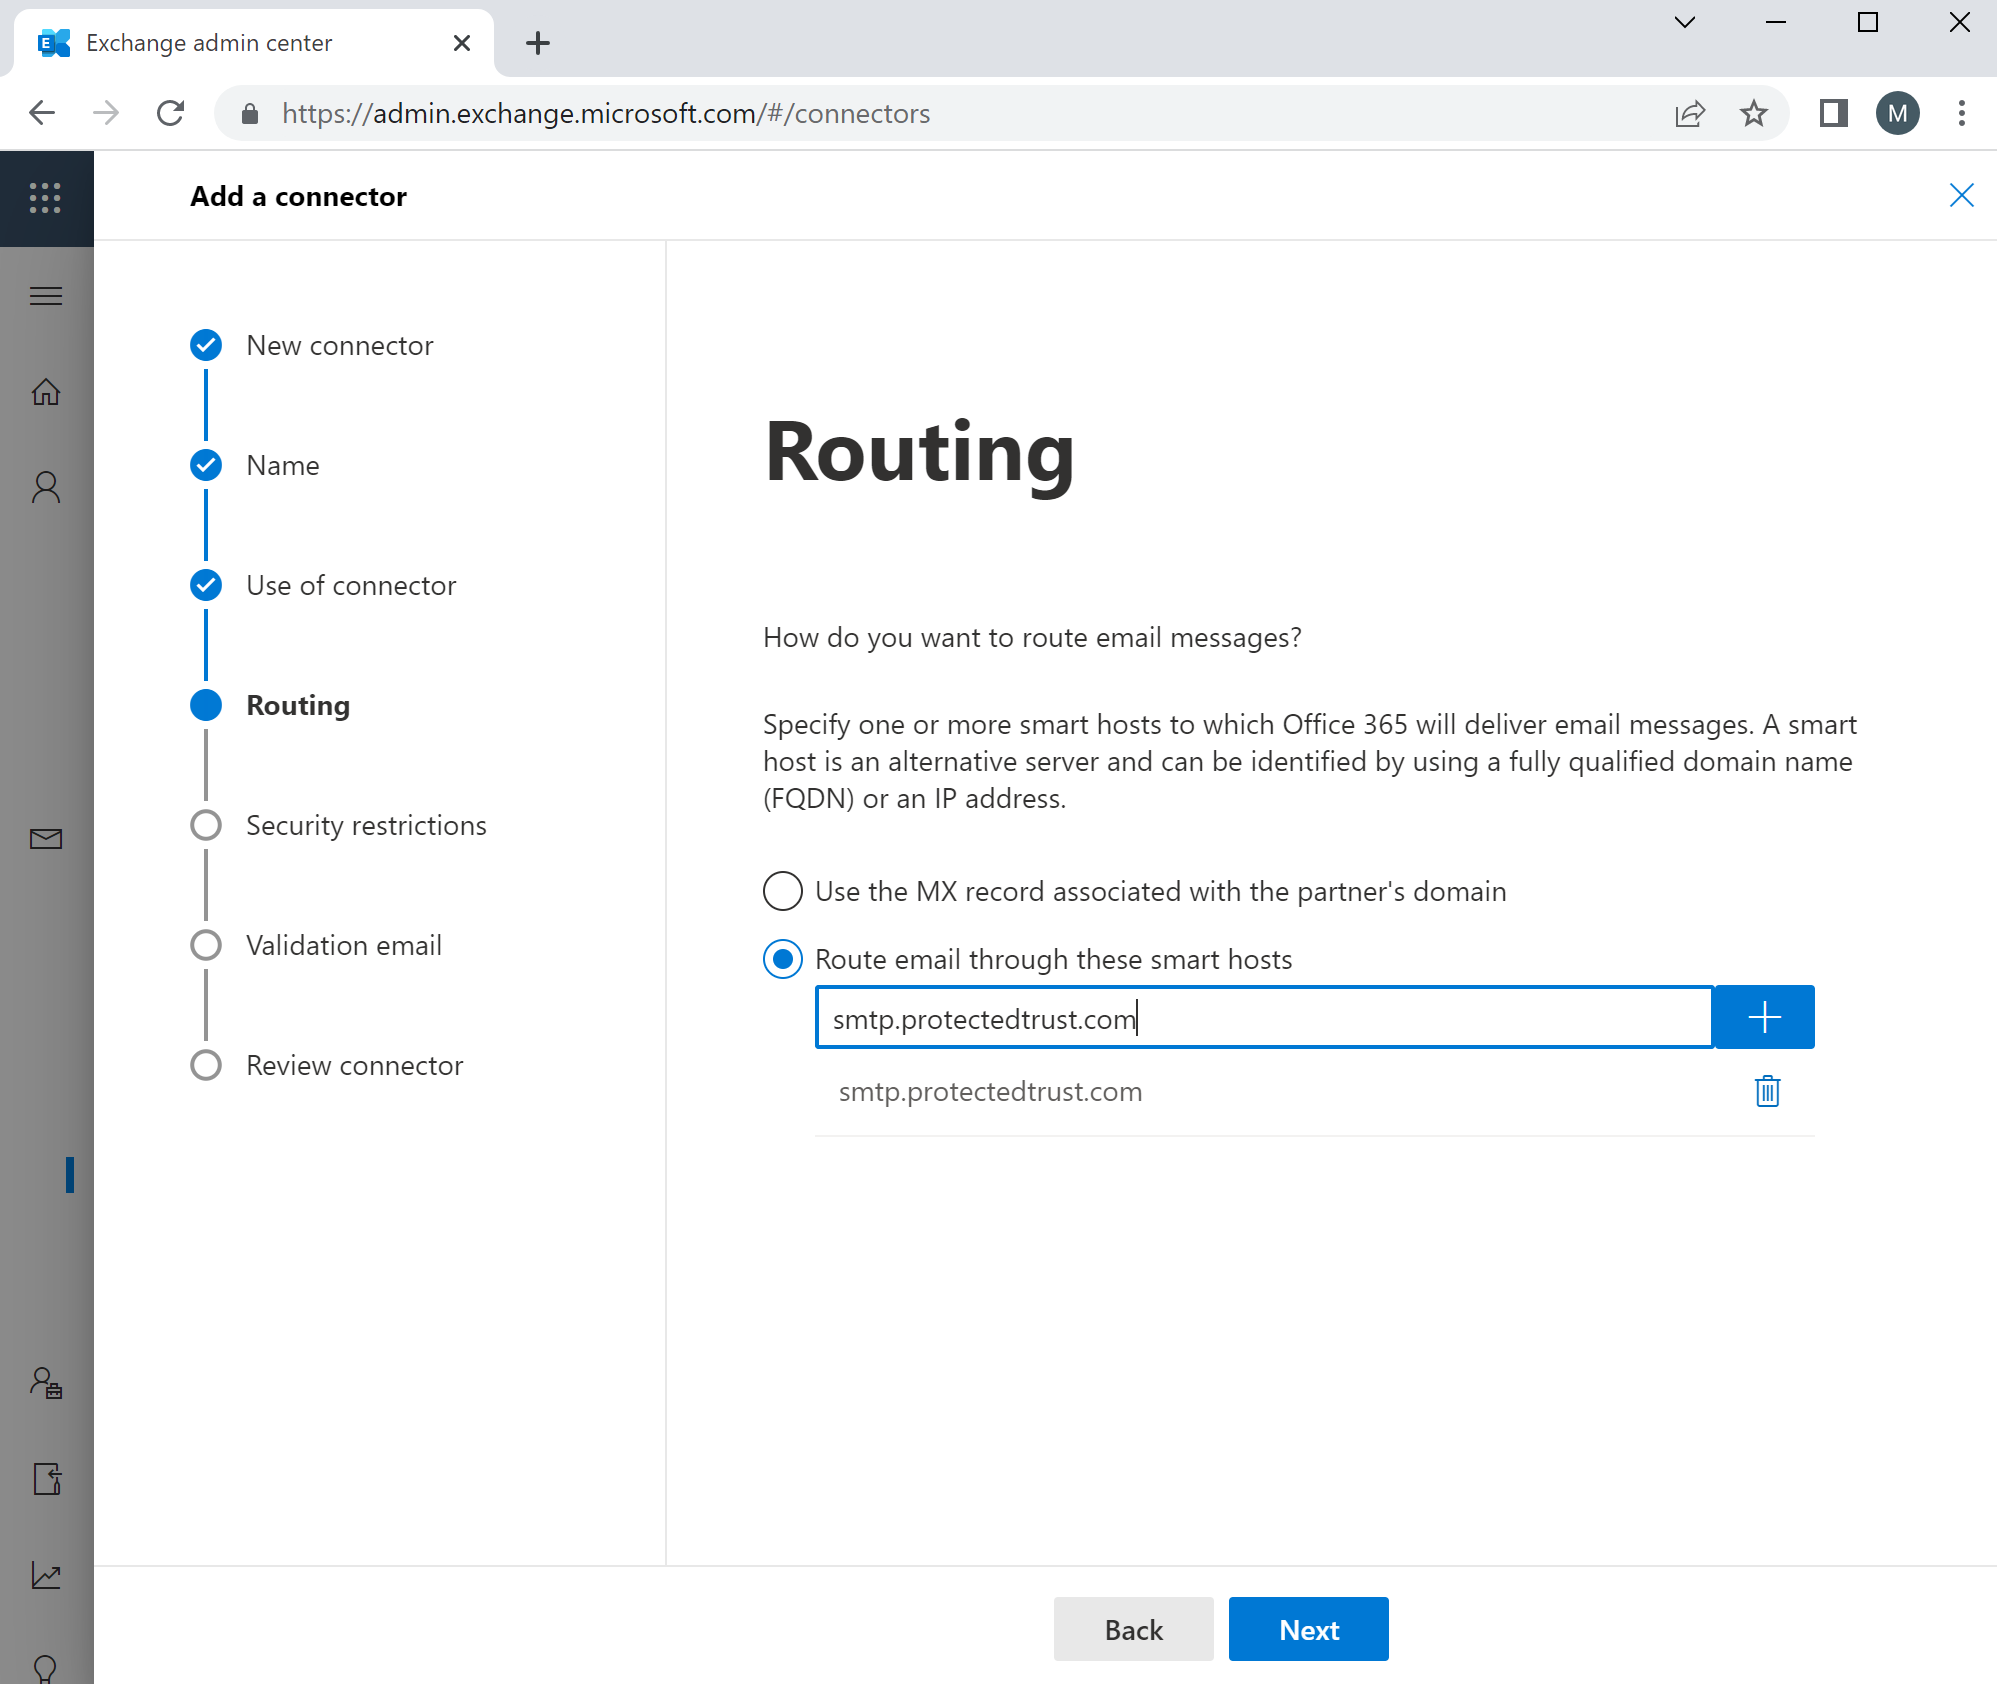
- Select to Route email through these smart hosts, smtp.protectedtrust.com, click (+) to add the smart host, then click Next
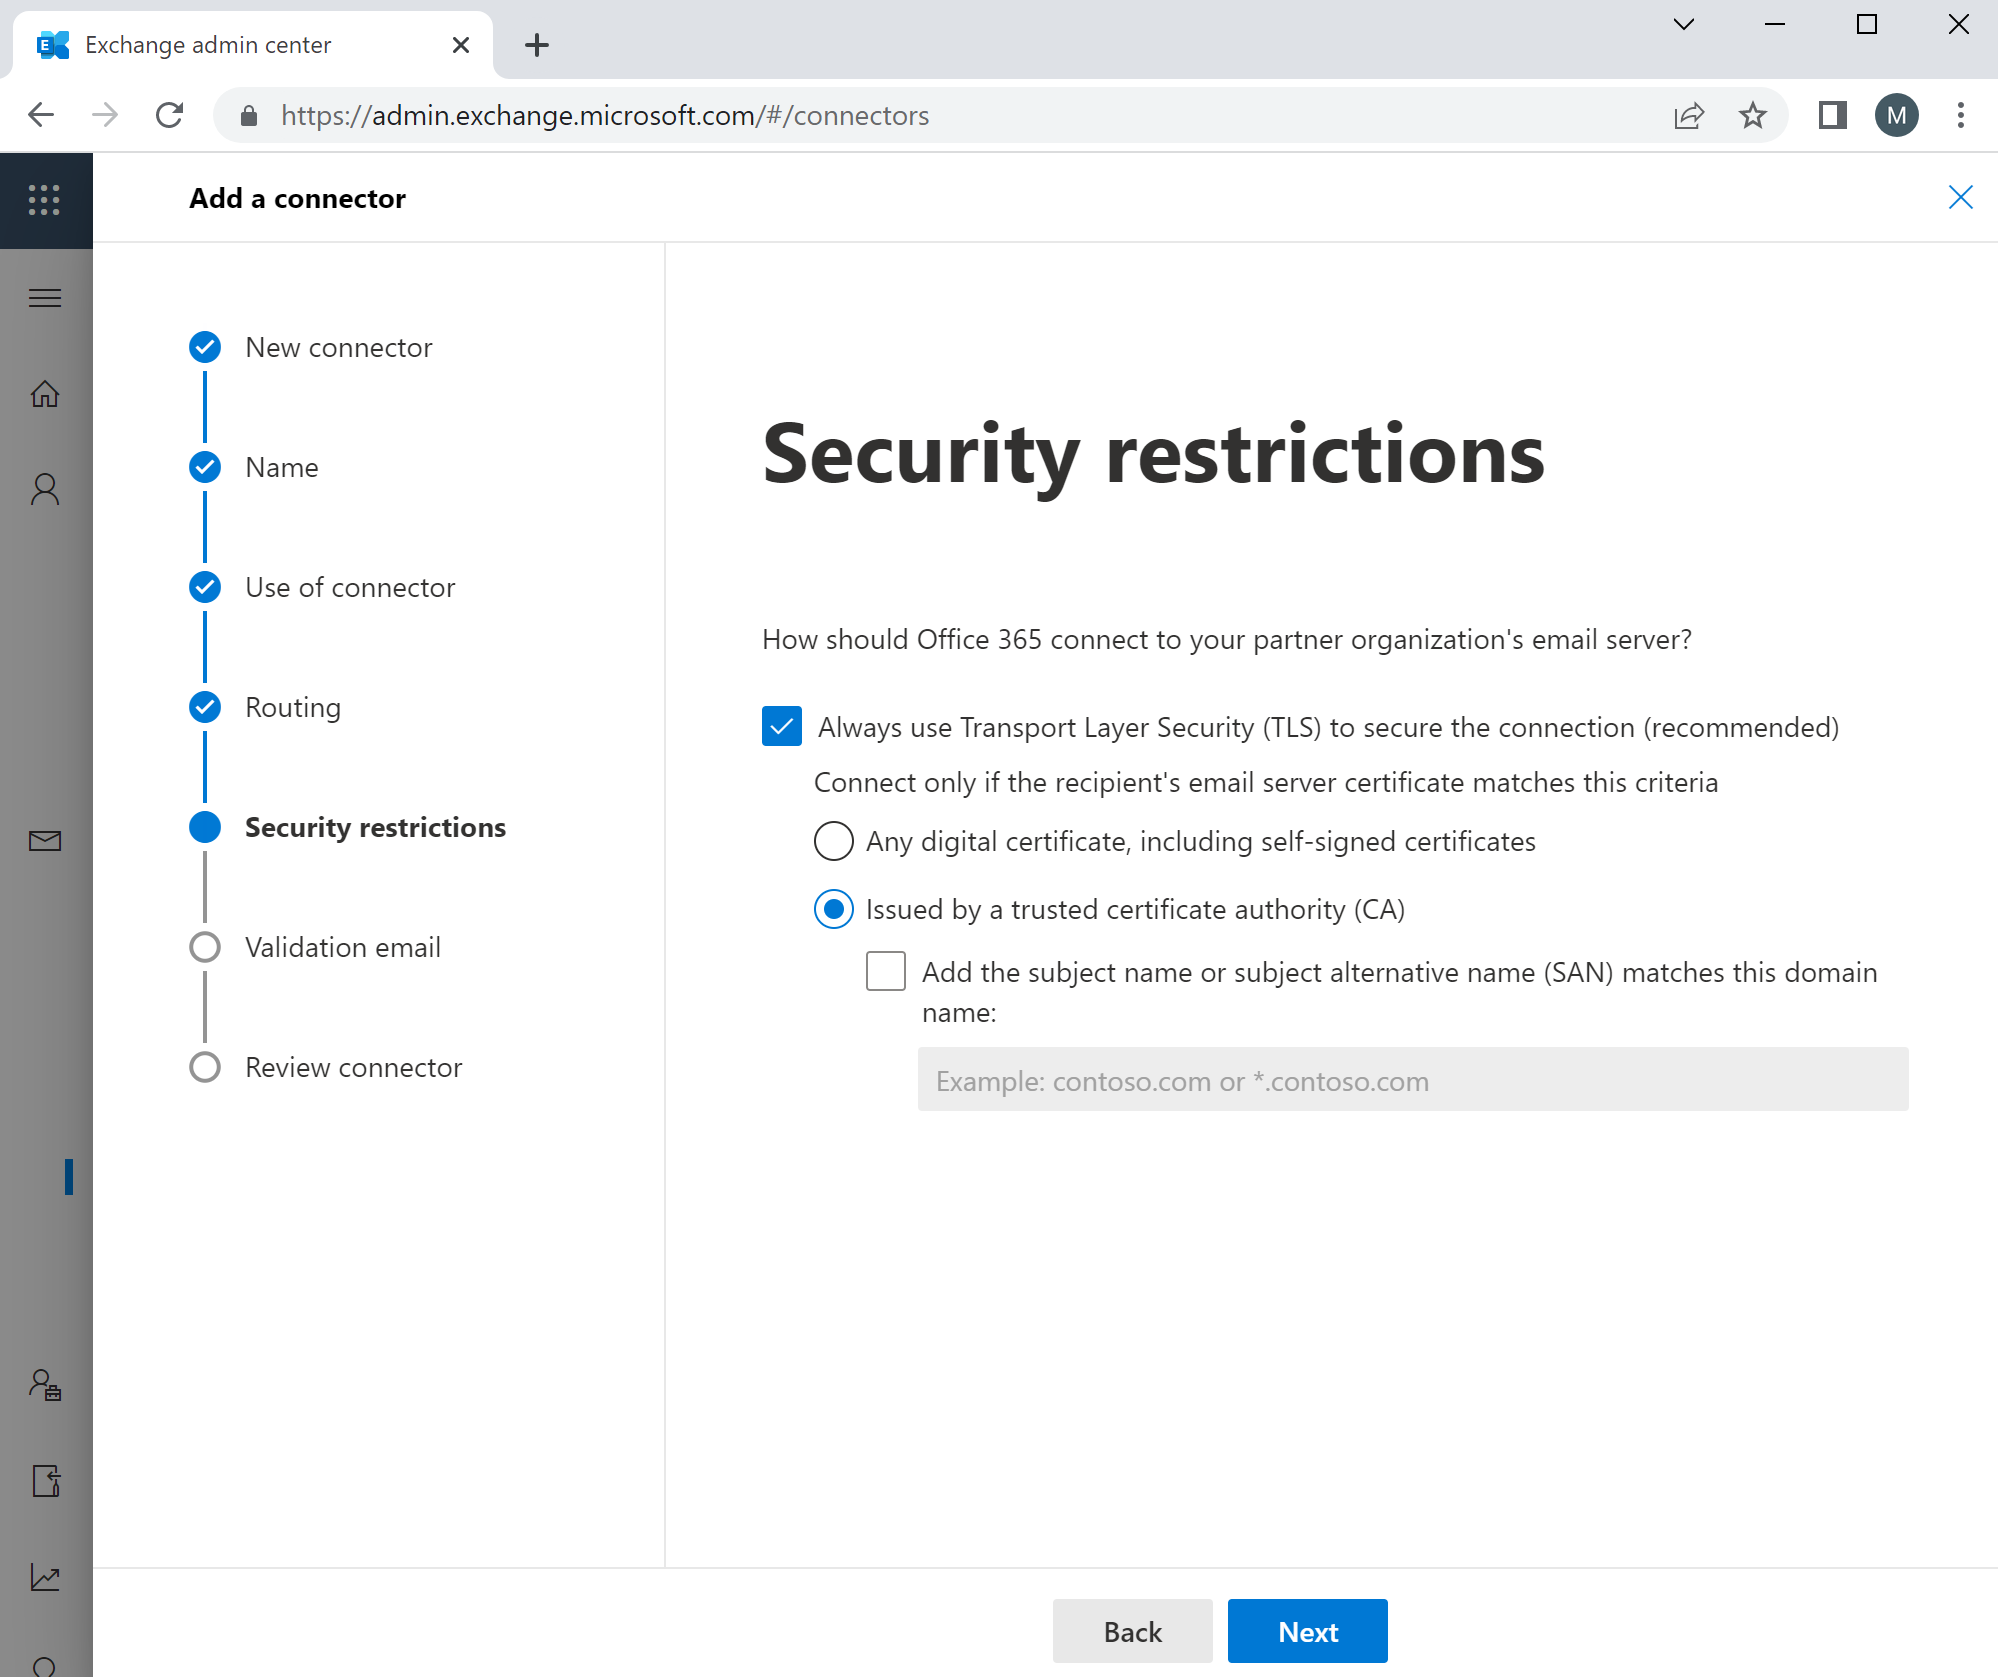
- Select Always use Transport Layer Security (TLS) to secure the connection and to connect only if the recipient's email server certificate matches this criteria Issued by trusted certificate authority (CA), then click Next
- Enter the email address associated with your credentials in Step 1, and click Validate.
Confirm that the task Check connectivity to smtp.protectedtrust.com Succeeds.
It is expected that send test email to Fail since we have not yet set the authentication credentials.
Select Yes, when asked do you really want to go without successful validation?
Click Next to continue.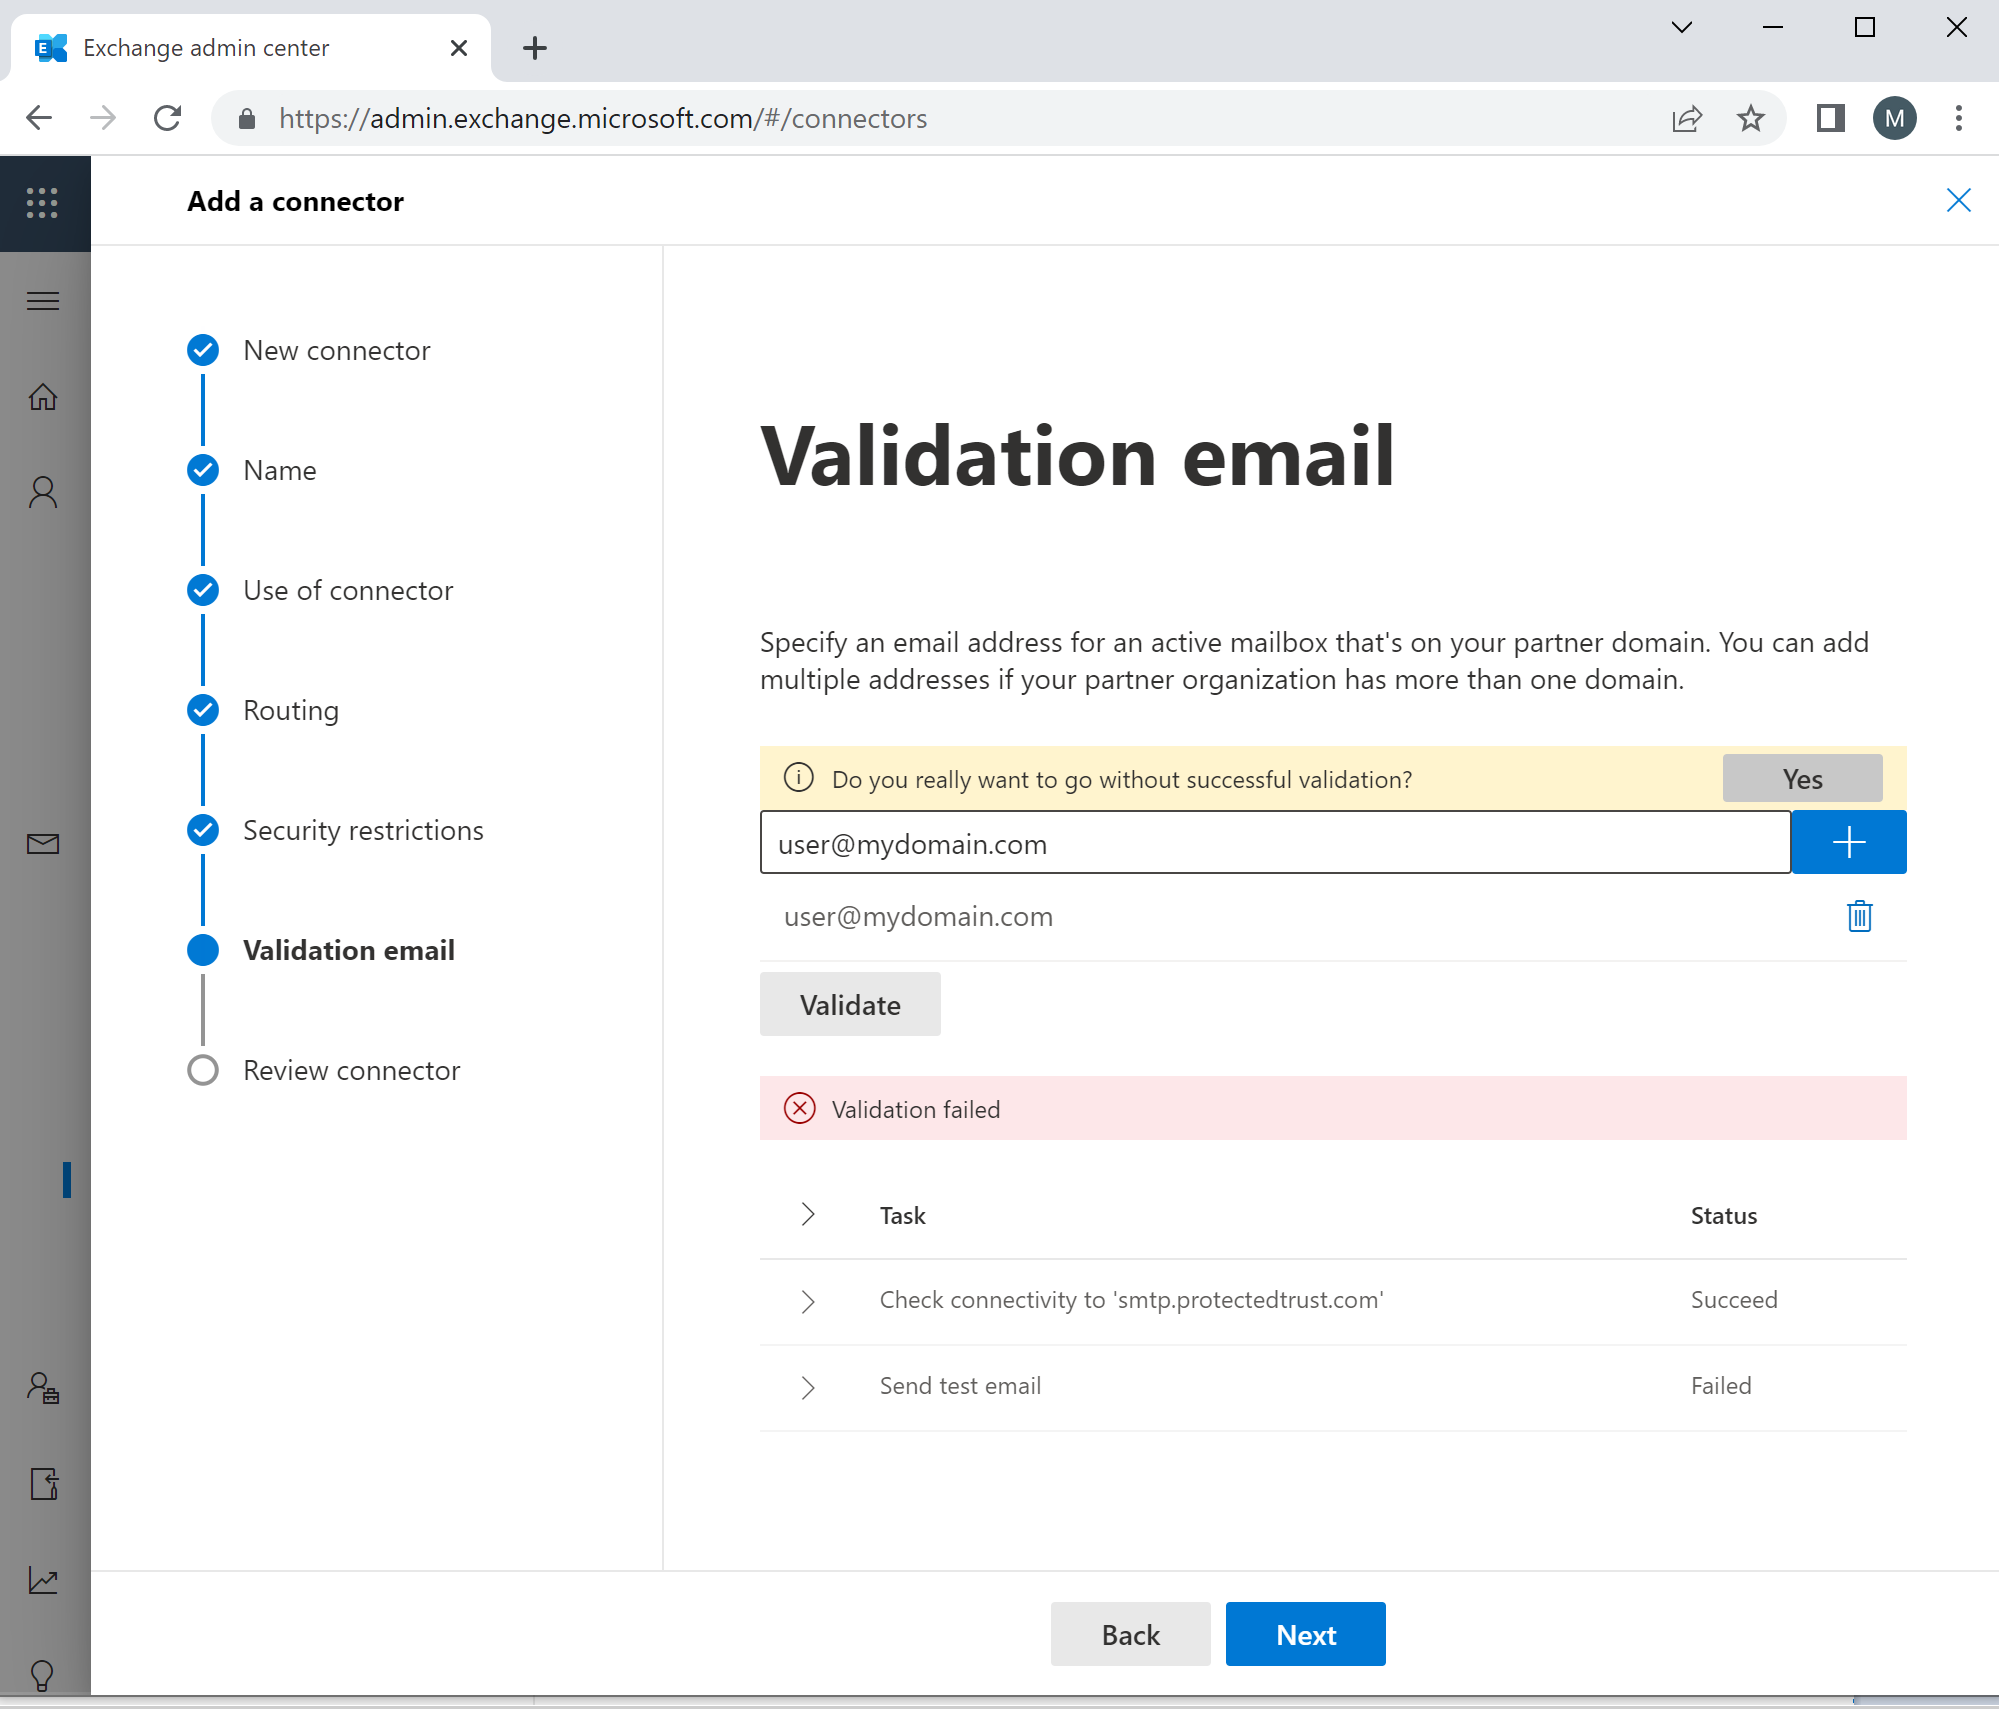
- Review connector settings and click Create Connector
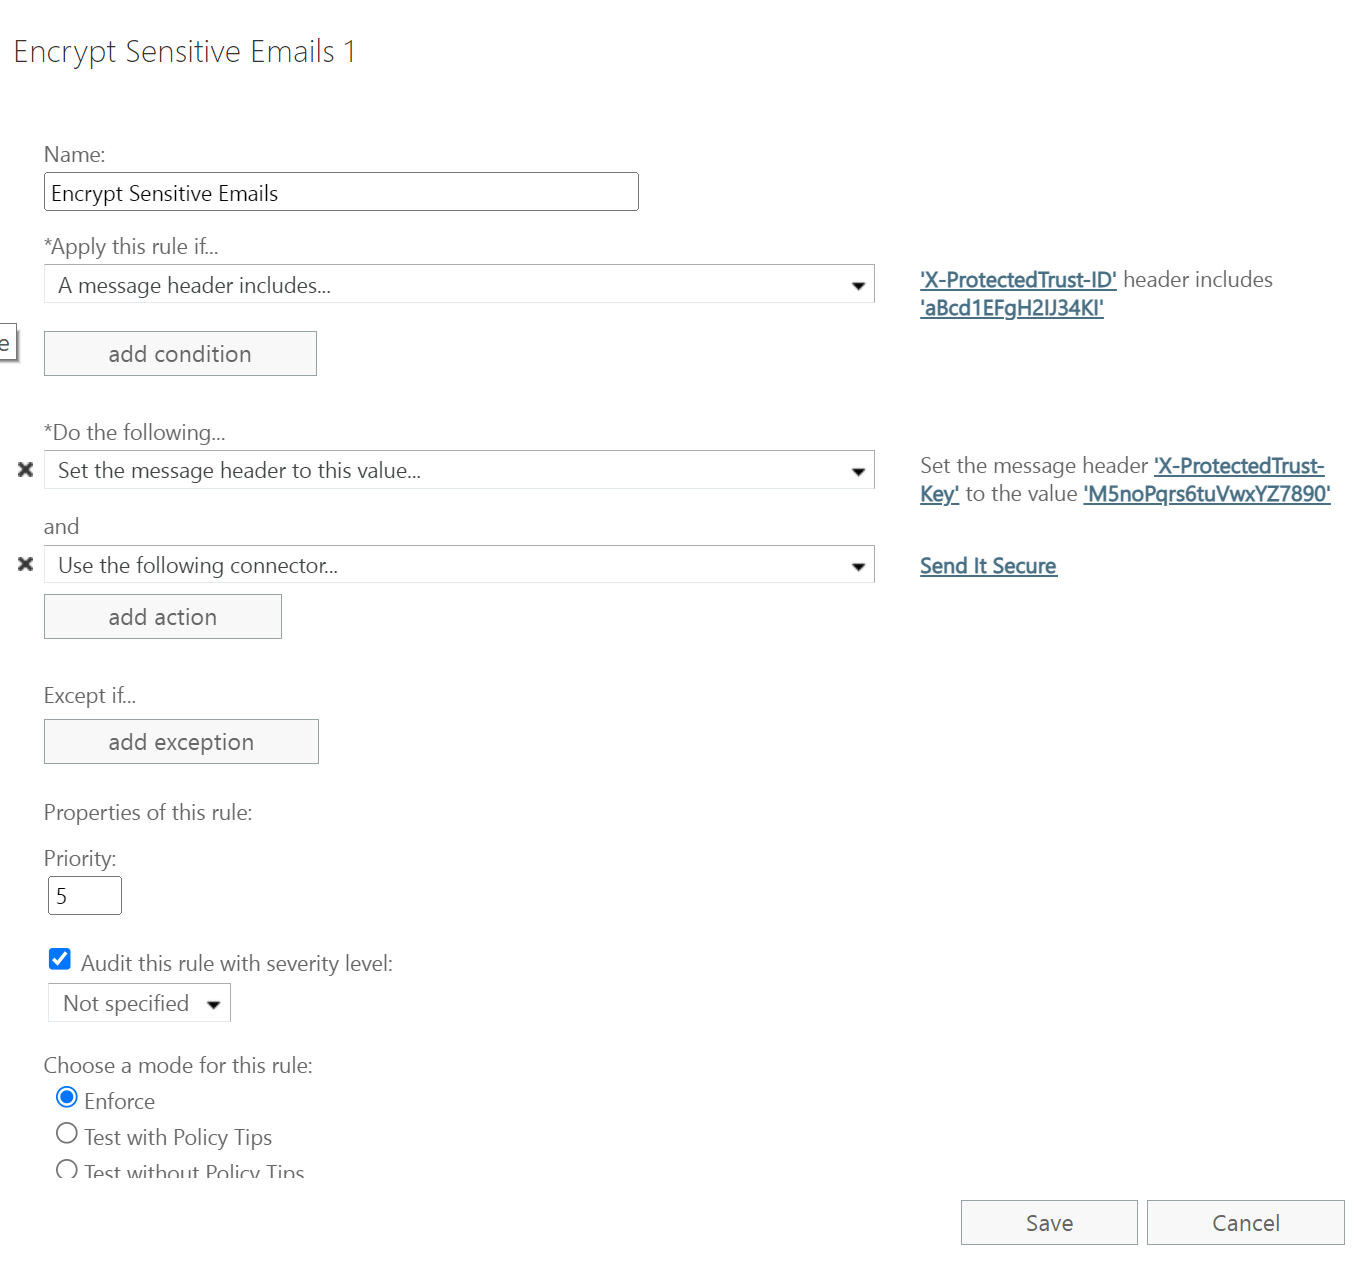
- The Send It Secure Smart Host will authenticate via headers on the emails sent to smtp.protectedtrust.com. You can create these headers using DLP policies
from the Exchange Online Compliance center https://compliance.microsoft.com/datalossprevention or using Mail Flow Transport Rules https://admin.exchange.microsoft.com/#/transportrules. There are many ways to add the headers and set the sensitive data rules in Exchange Online.
The Headers are as follows, and the values are found in the settings created during Step 1:
- <X-ProtectedTrust-ID>:<AccessID>
- <X-ProtectedTrust-Key>:<AccessKey> - Create a Mail Flow Transport Rule to send messages through the Send Connector created in Step 2, you can also add the <X-ProtectedTrust-Key> here also, if you wanted.
- Go to https://admin.exchange.microsoft.com/#/transportrules
- Click (+) Create a new rule or edit an existing rule
- Note: It is very important you select More Options at the bottom of the new rule, in order to see all of the options you will need
- Here is where you set the "Apply this rule if... " setting and
- Be sure to set the Do the following... setting to Use the following Connector... selecting the Send Connector created in Step 2 "Send It Secure Smart Host"